
How To Make Olaf Pinata Easy DIY Tutorial - It was my daughter's birthday few weeks ago, as you can see we had Frozen Theme for her birthday party.
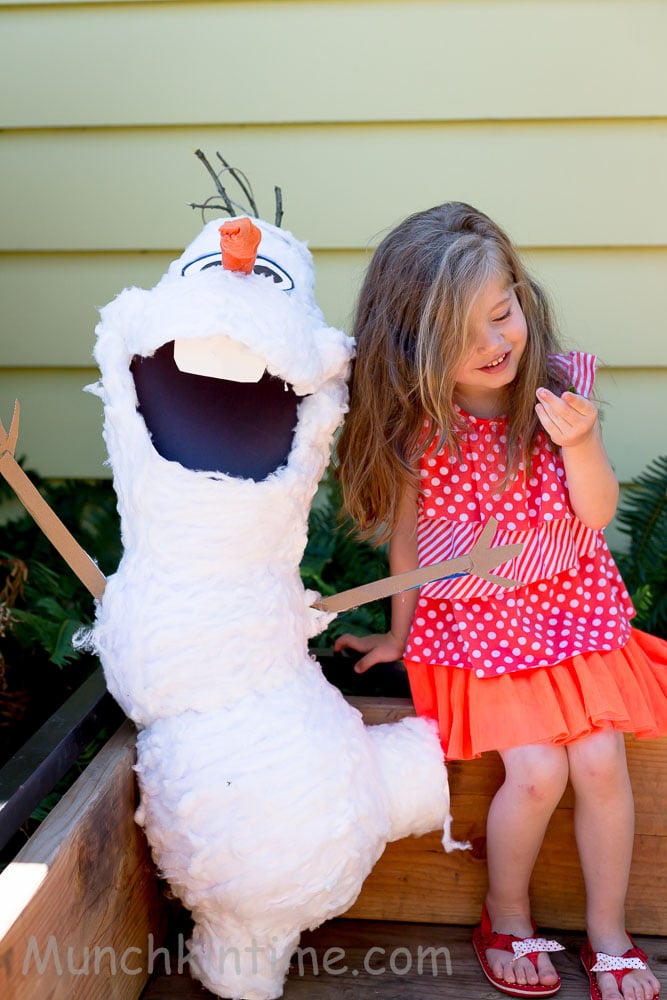
I absolutely enjoyed crafting handmade decor for her party like burlap and lace birthday banner, white snowy backdrop, Frozen blue tutu skirt, but my favorite crafty project was this Olaf Pinata.
I was so proud of myself since I have never made pinatas before and when I made Olaf Pinata it made me smile to see how happy my daughter Ani was.
It is not hard to make as it seems and it cost me around $5.00 not bad compare to buying it online for $60.00.

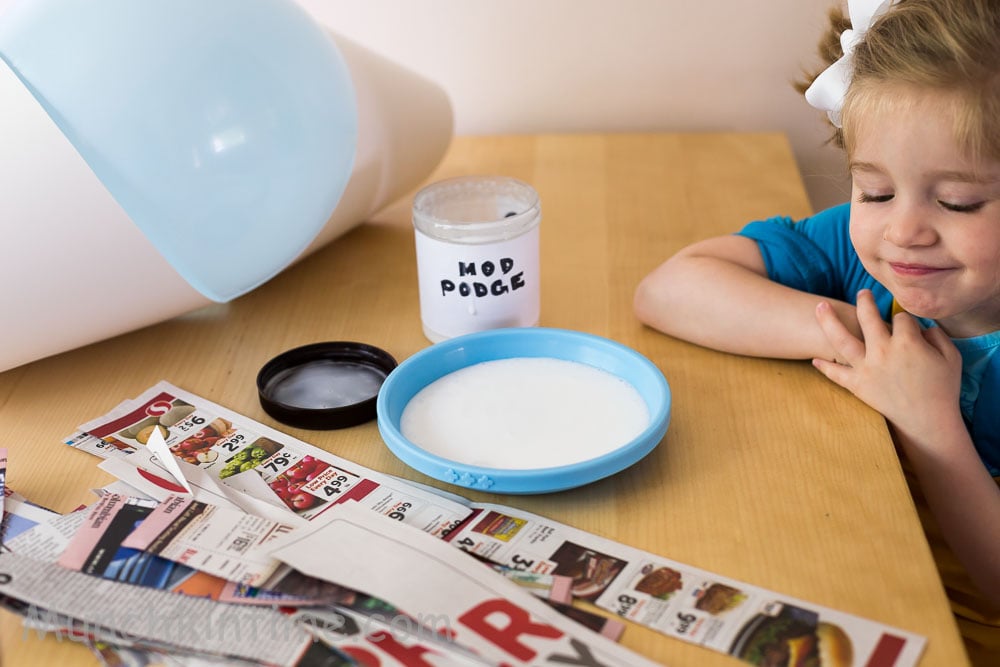
To make Frozen Olaf Pinata you will need:
one white poster paper
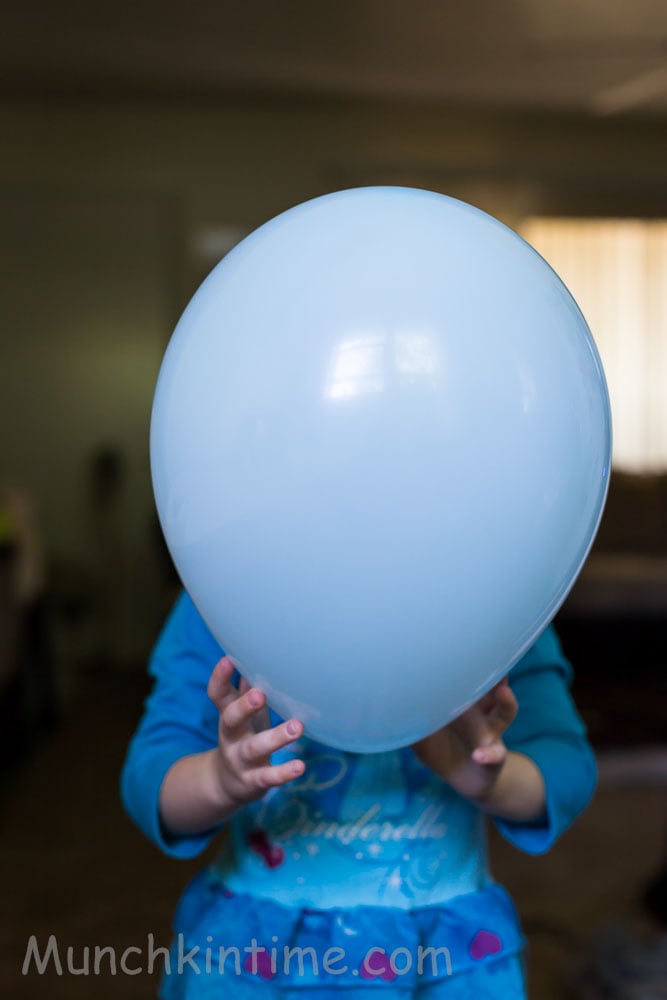
3 balloons
scissors
homemade mod podge
old newspaper
white paper
foil
tape
orange felt or paper
recycled cardboard
hot glue gun
string
cotton balls
tree branches

How to make Olaf Pinata:
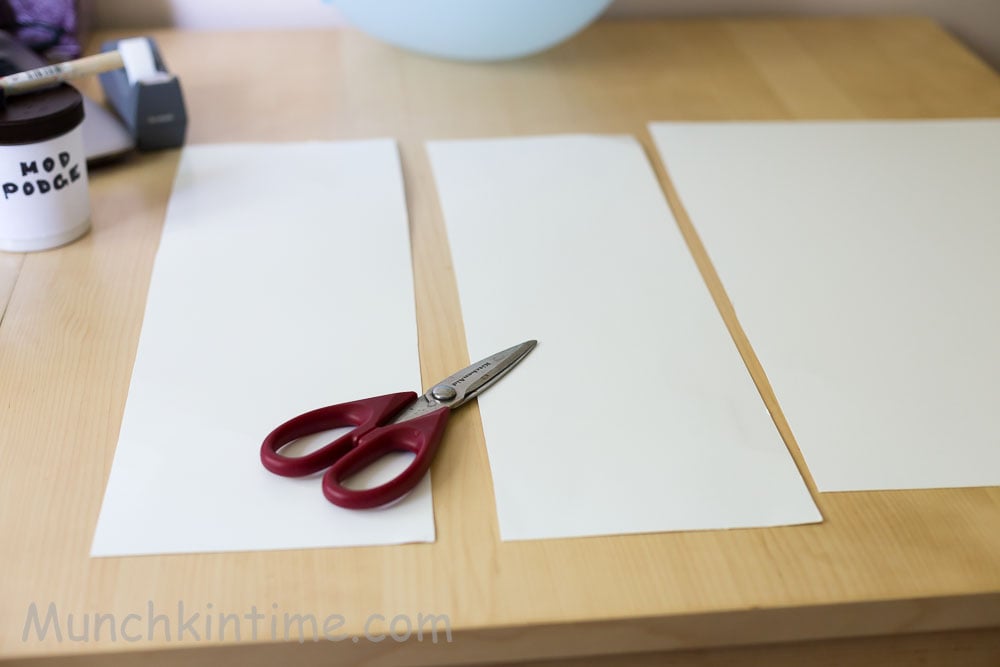
1. Cut white poster in half.
2. Then cut one half in half again.
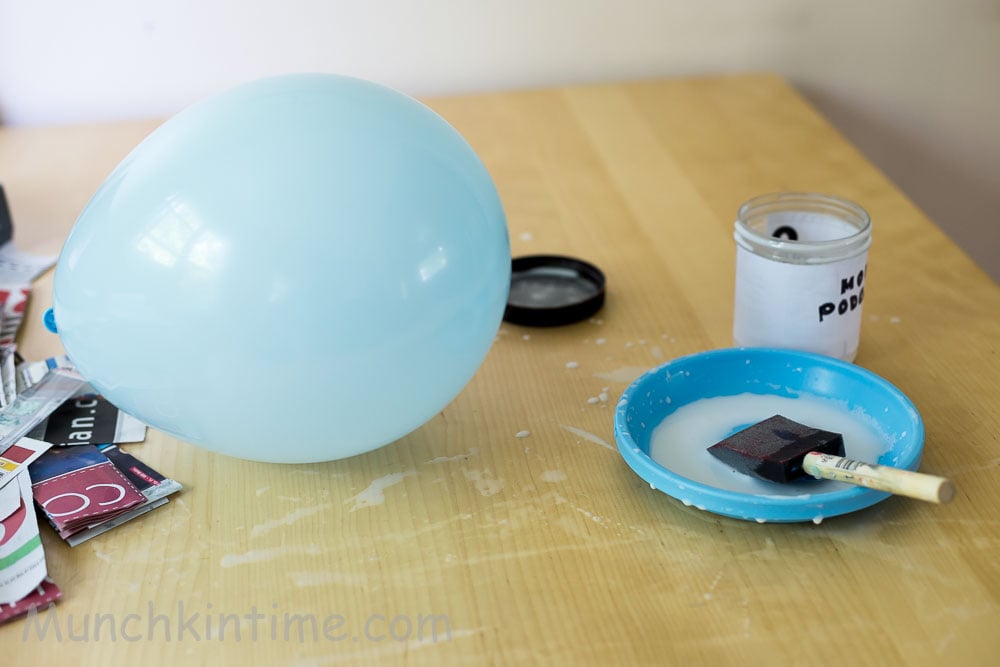
3. Blow a big size balloon.
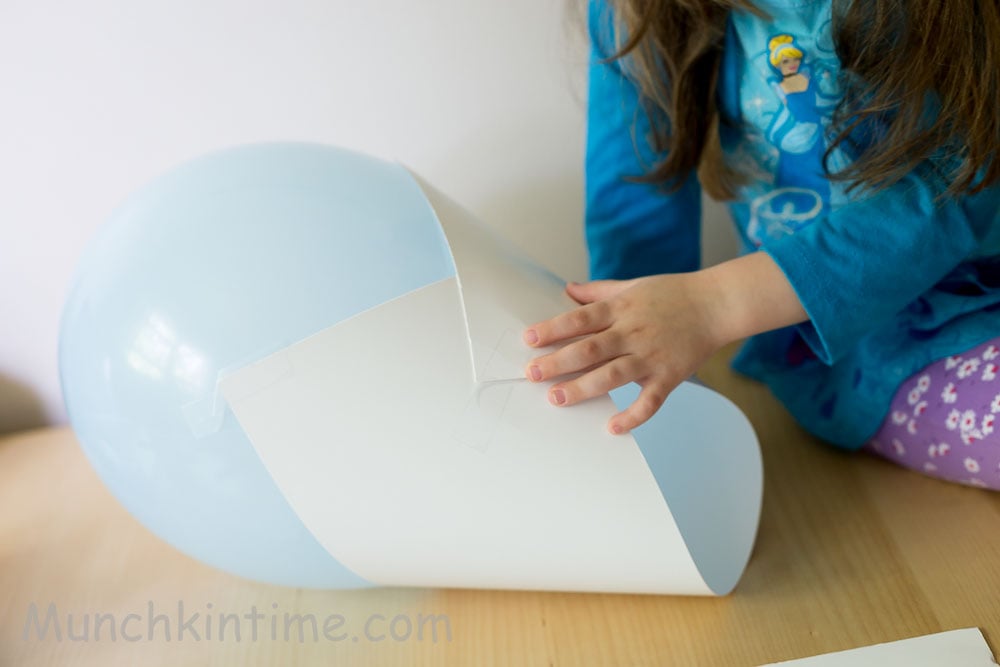
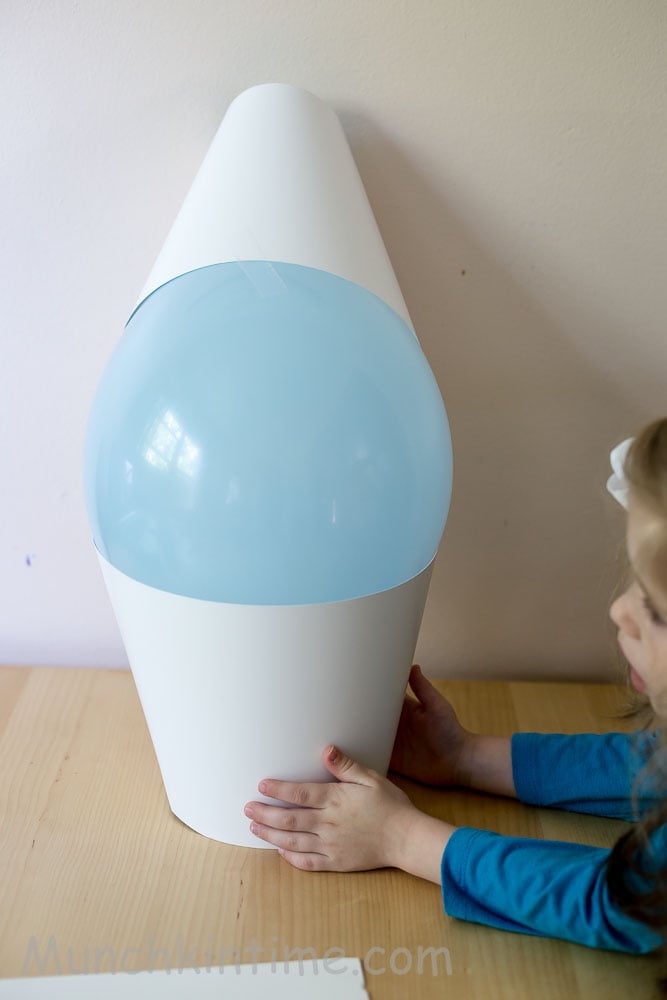
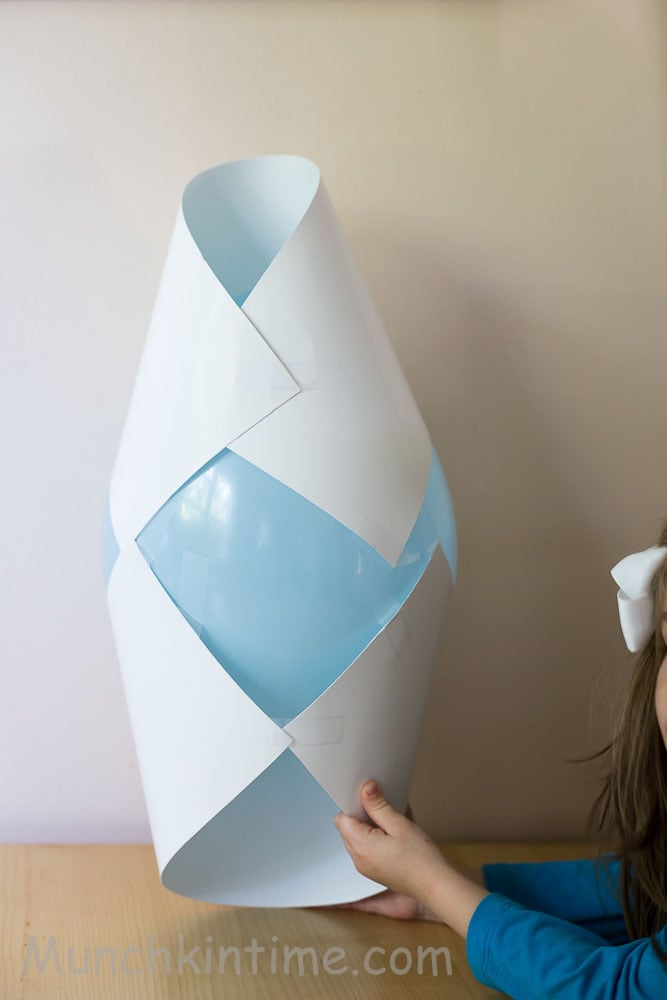
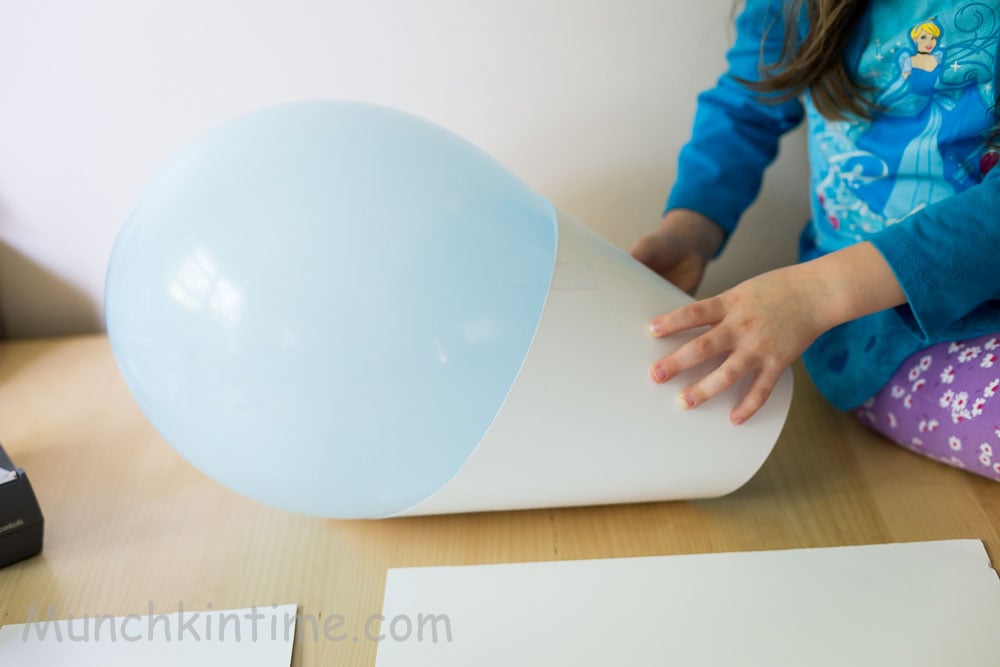
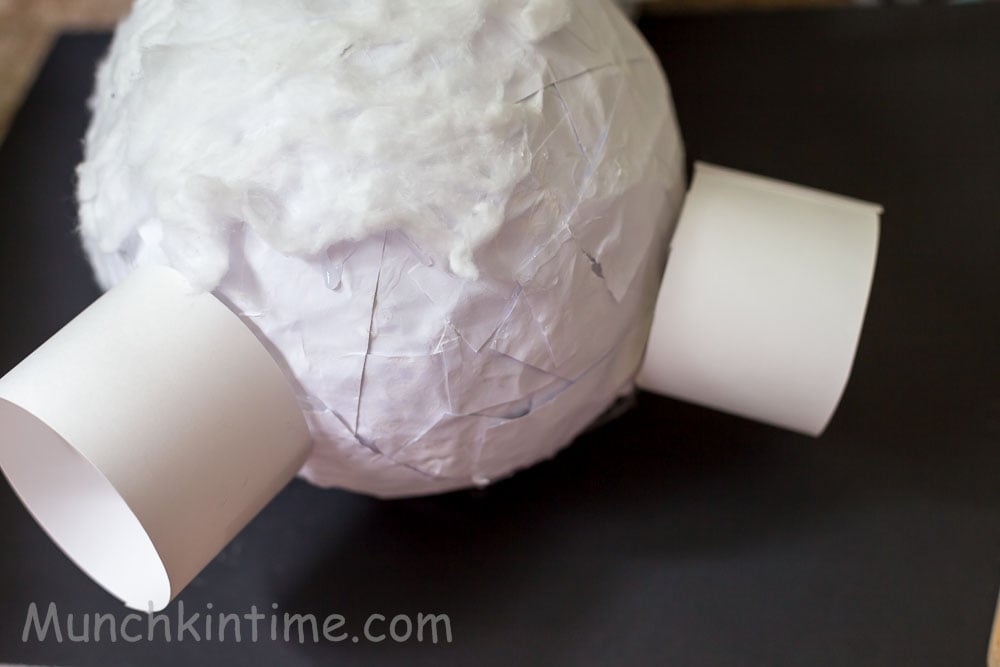
4. Cover with 2 ¼ of the poster sheets on top and the bottom of the balloon, secure it with tape.It should look like this.
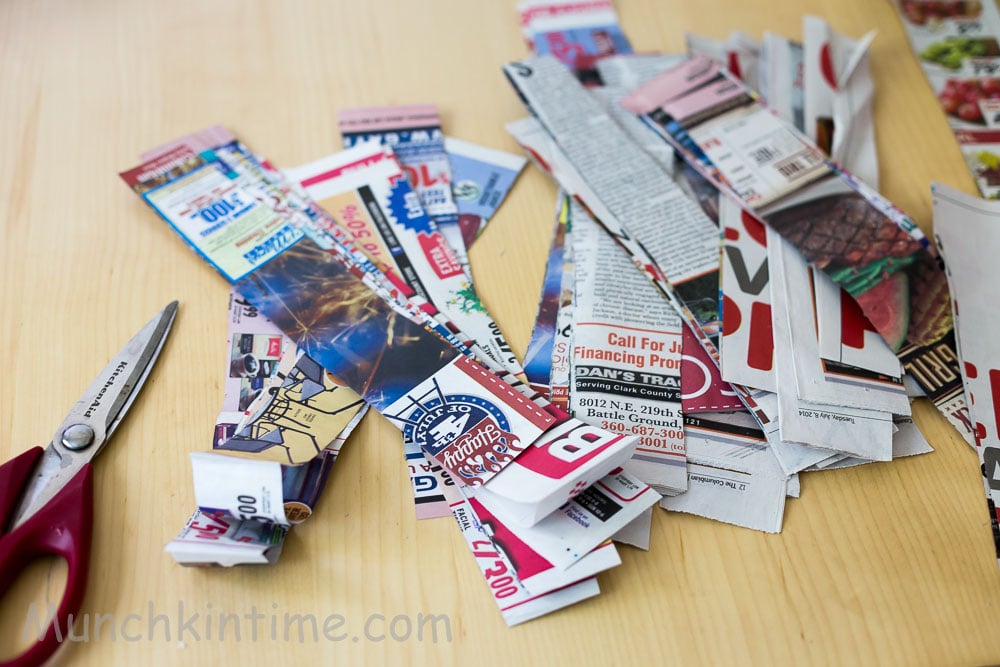
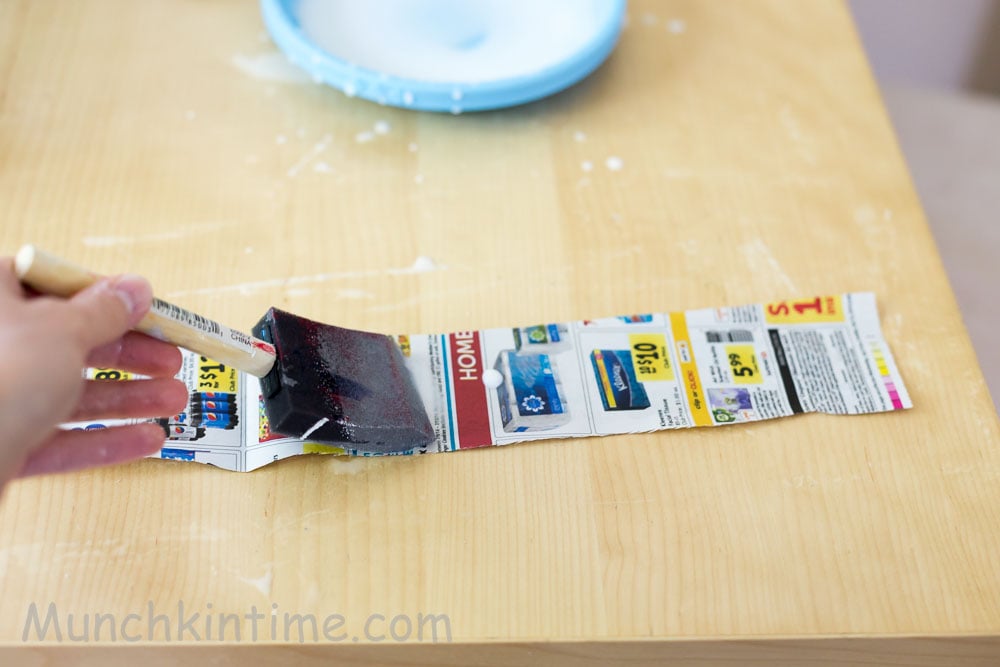
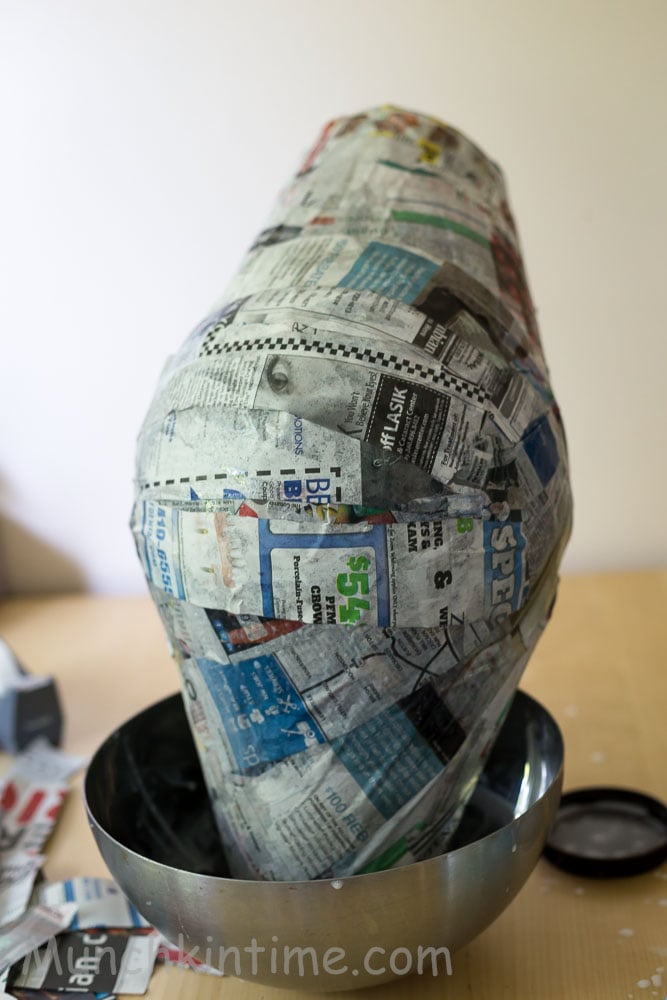
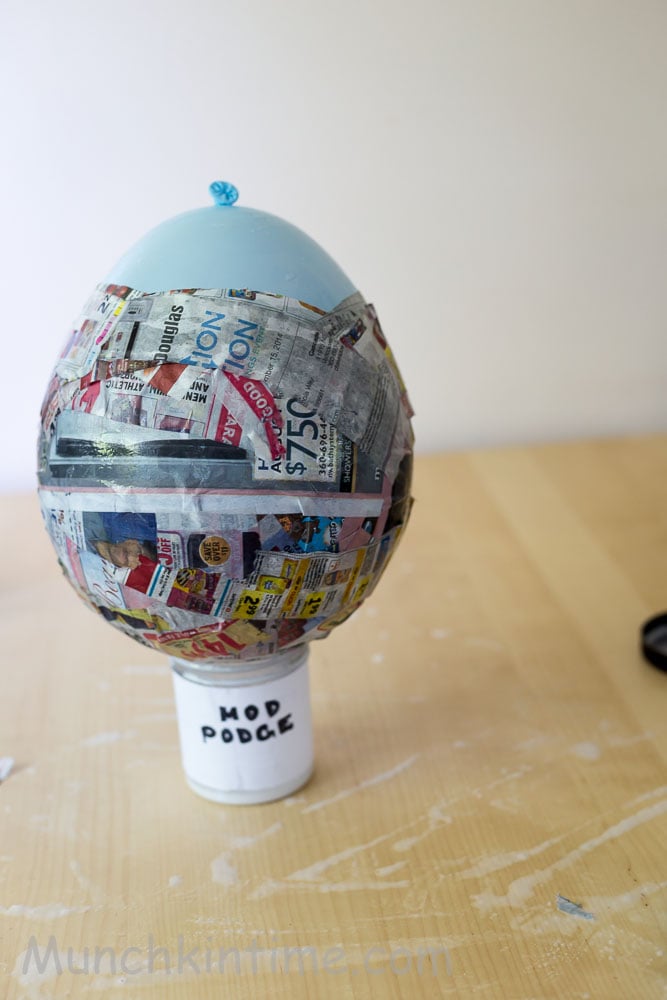
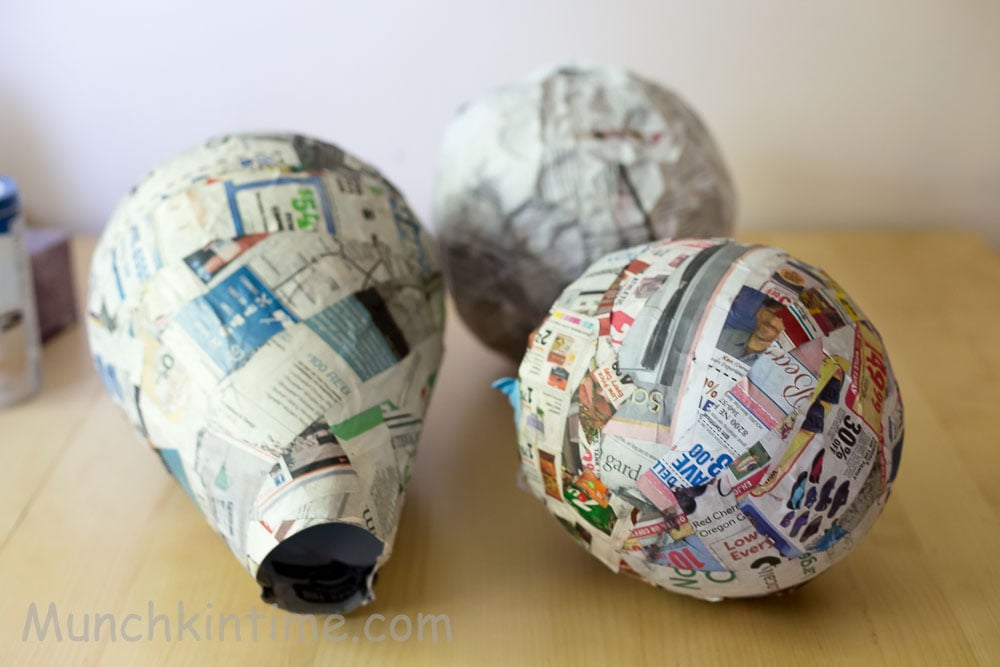
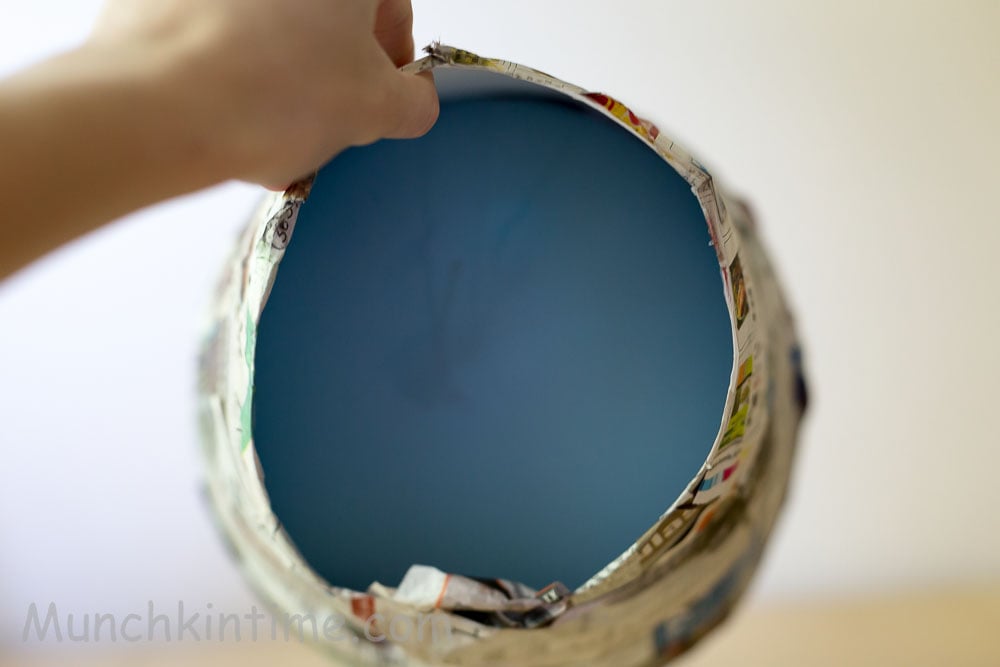
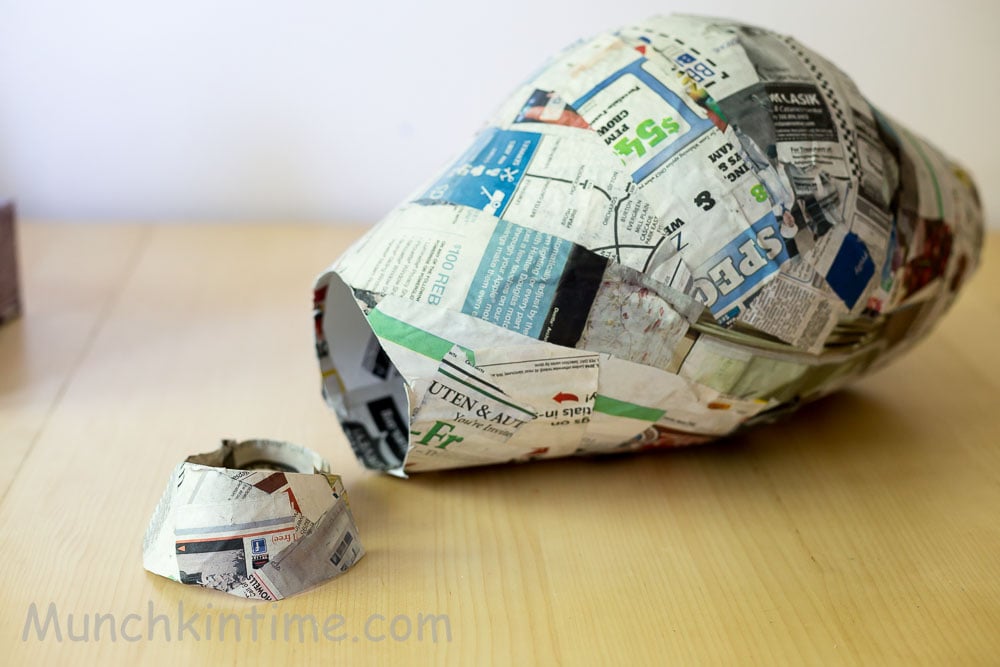
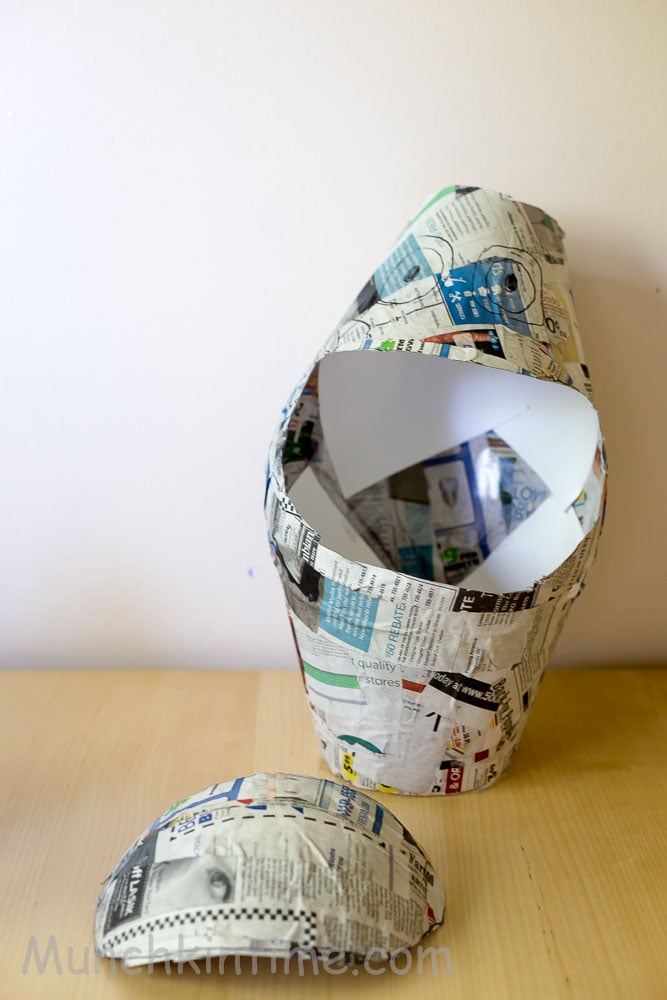
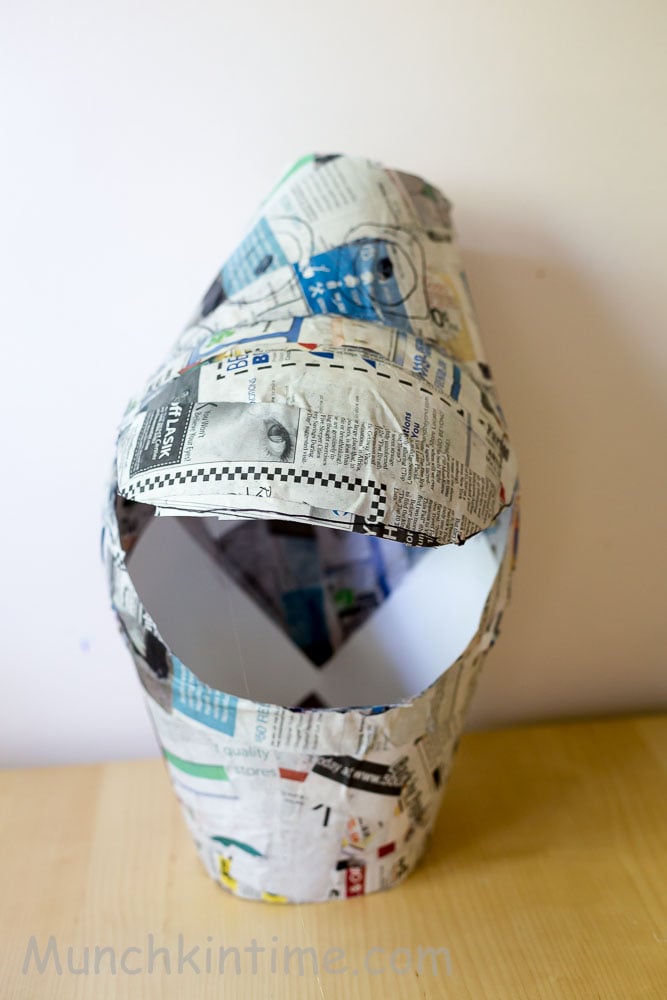
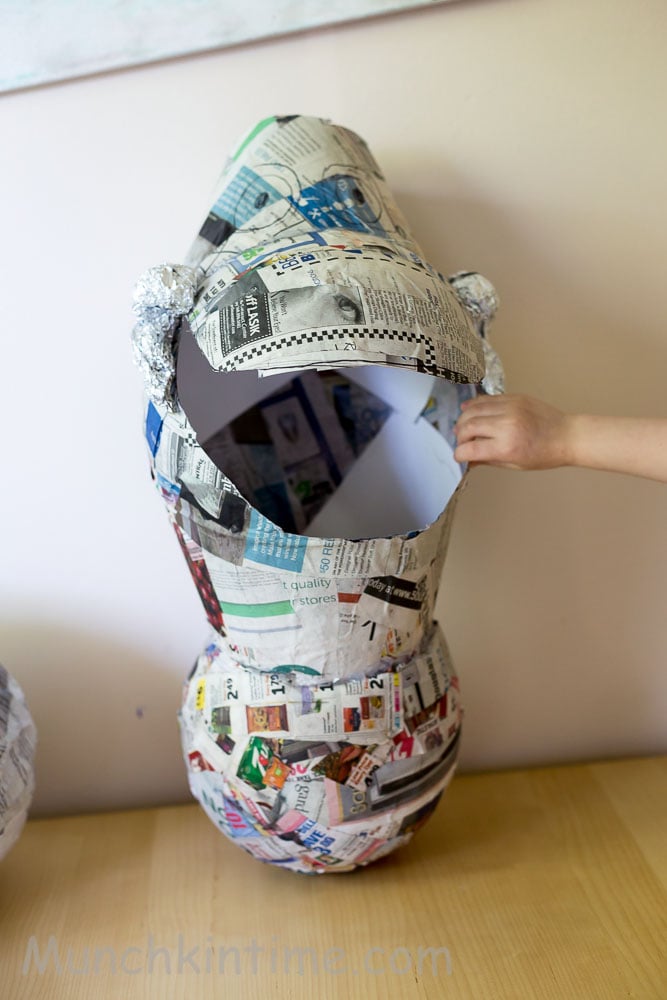
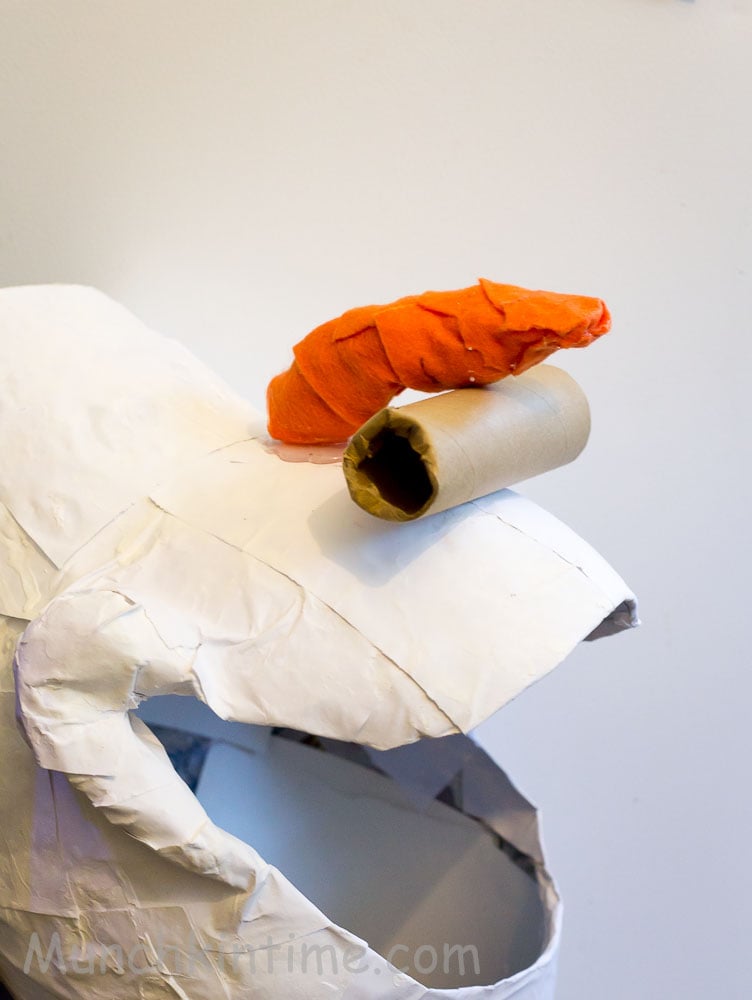
5. Cut an old newspaper into 1-2 inch strips.6. Mod podge it and cover your balloon.7. Let it dry.8. Make 2 more balloons but one smaller size than other then mod podge them and let them dry.9. Pop the balloons inside.10. Cut 2-3 inches off the top, that is going to be our head.11. Cut out Olaf's nose just like in this pic.
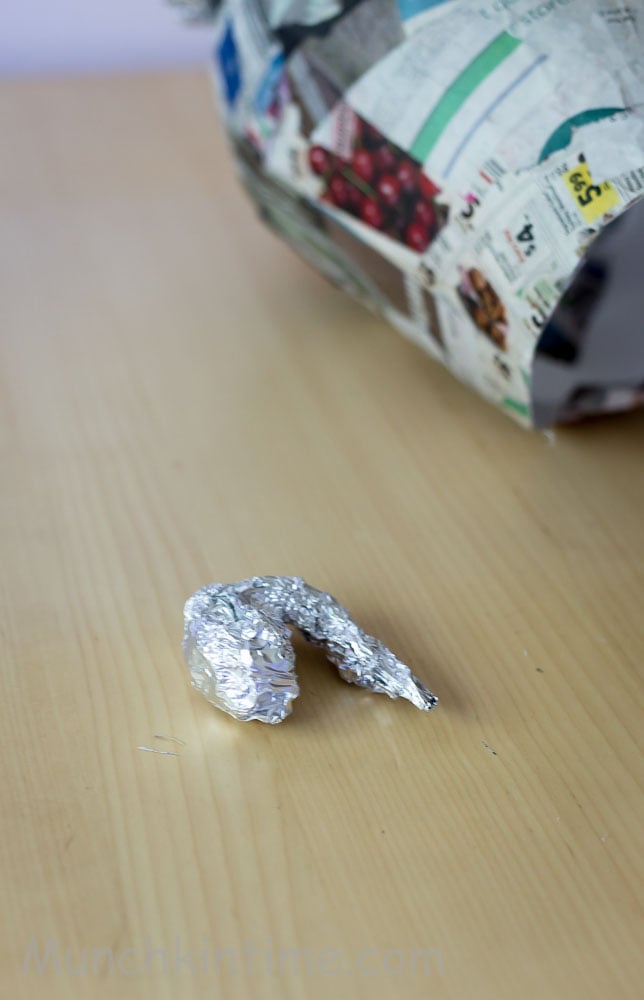
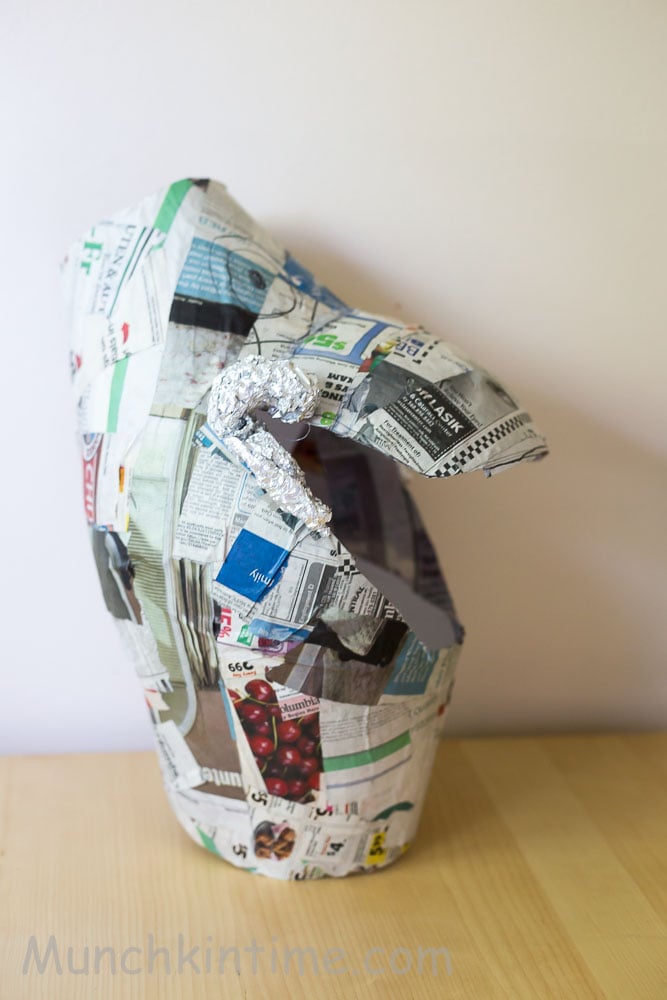
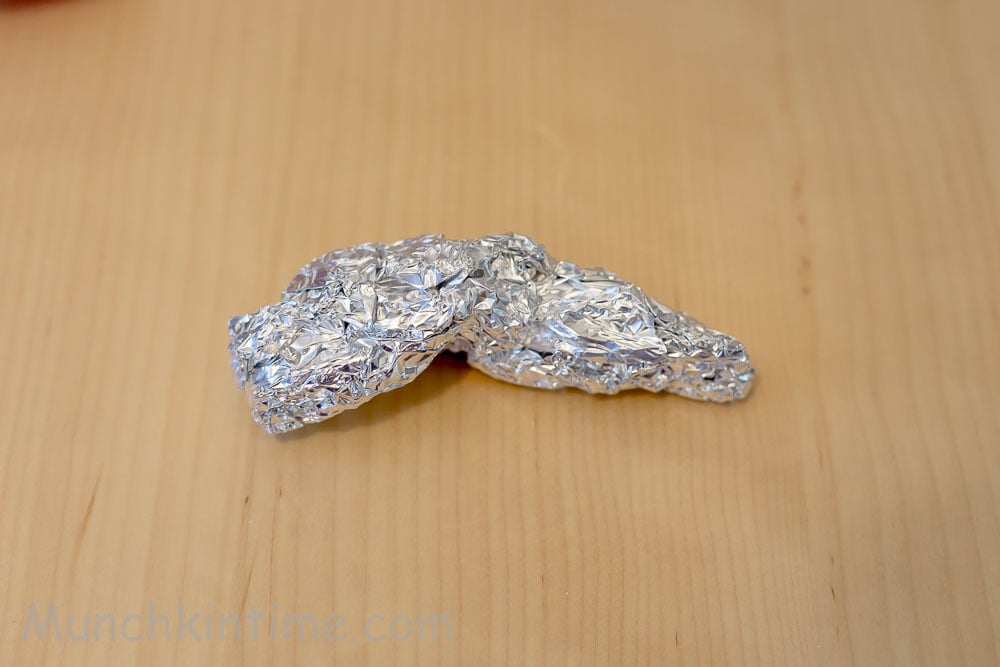
12. Using a glue gun glue the noise to Olaf's head.13. Take 2 foil papers and shape them up like a comma shape.
14. Attach them to the both sides of the mouth using glue gun.
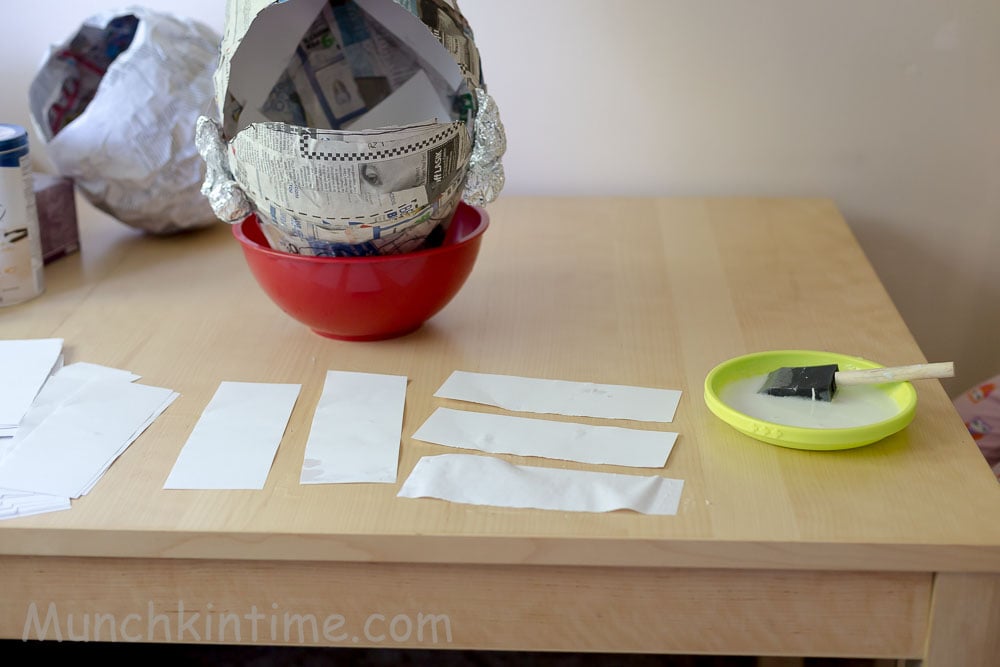
15. Mod podge Olaf's head and 2 other balloons with white paper.
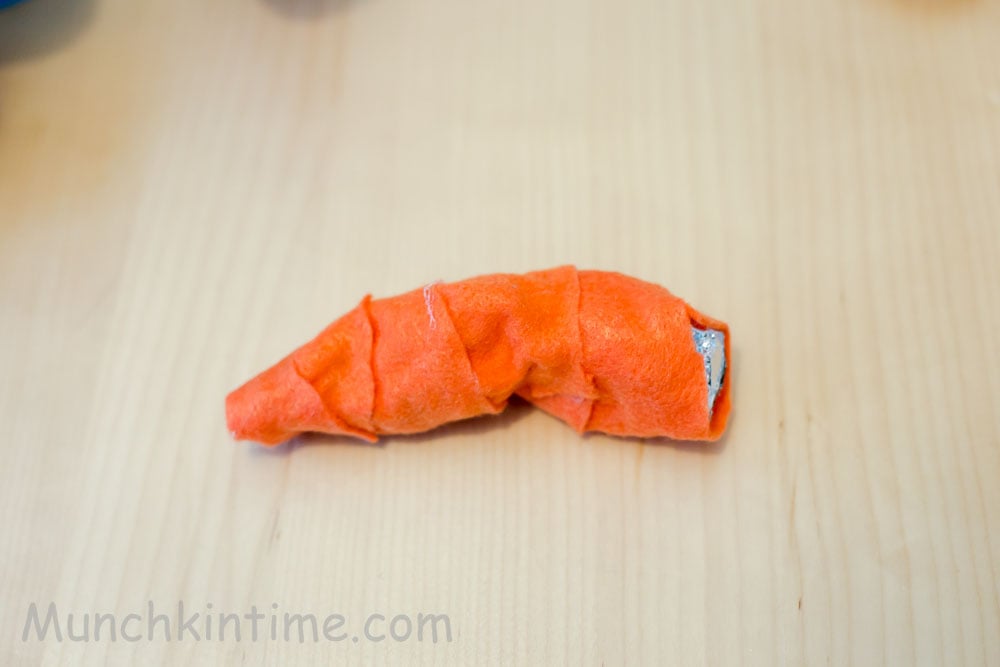
16. Make Olaf's nose.
17. Glue it to Olaf's face.
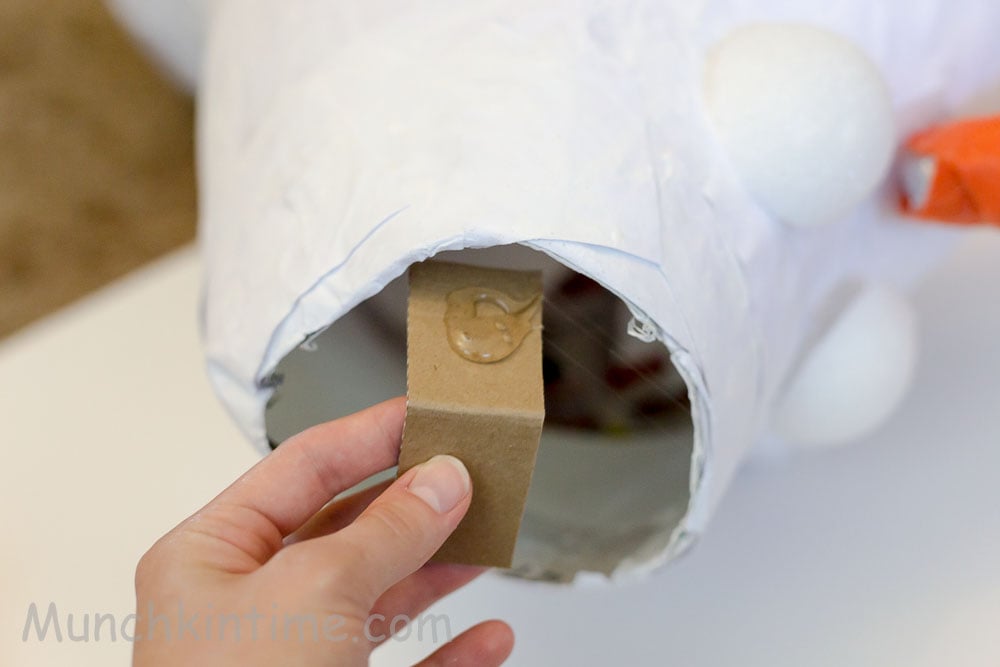
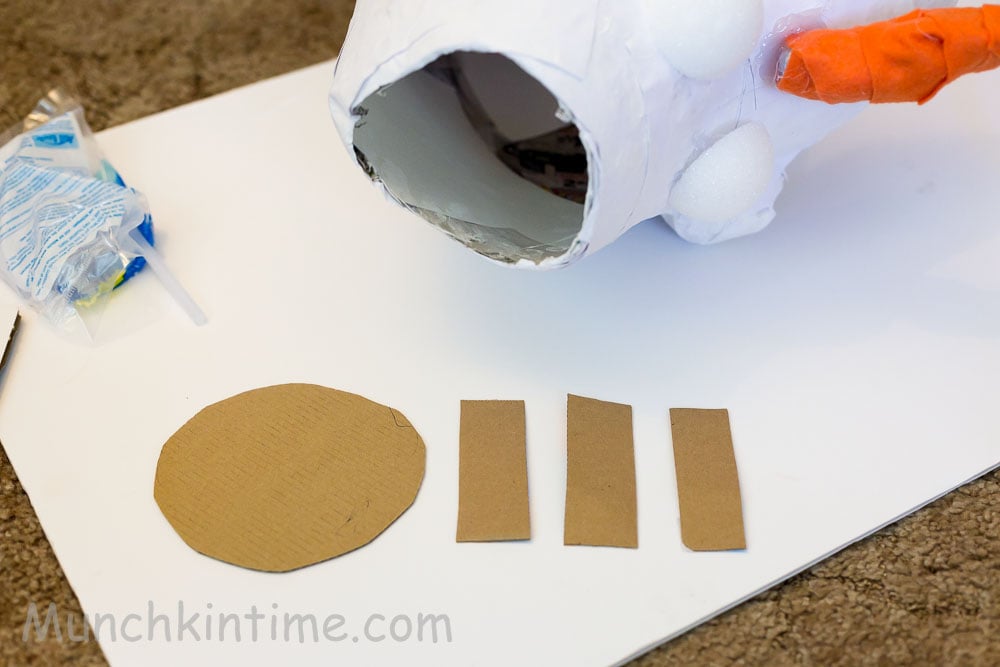
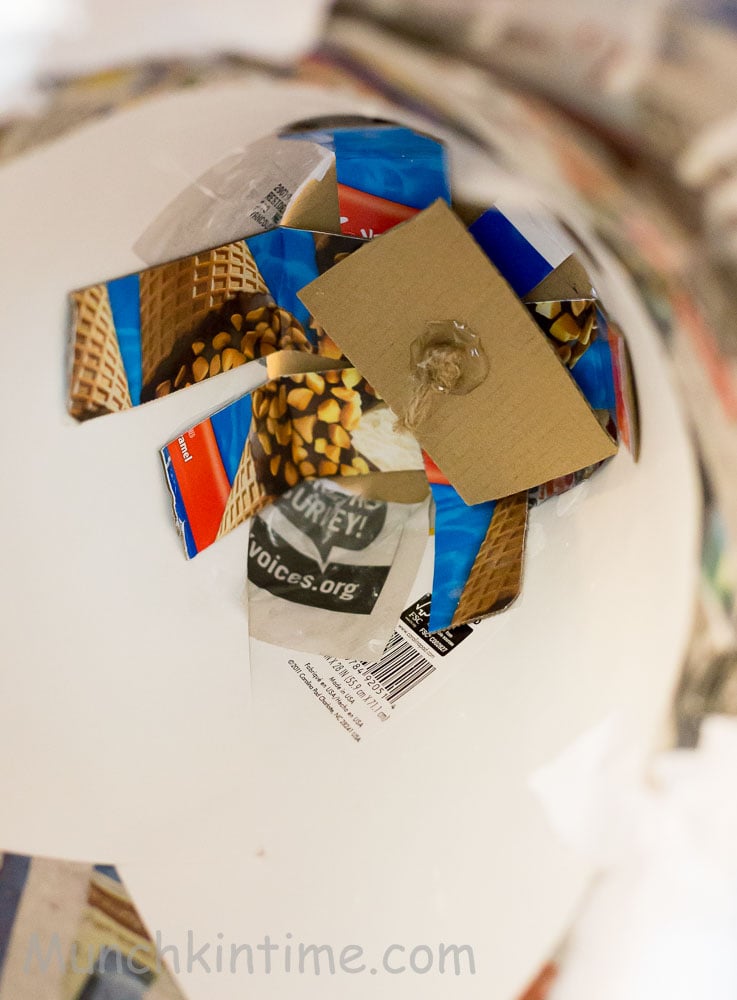
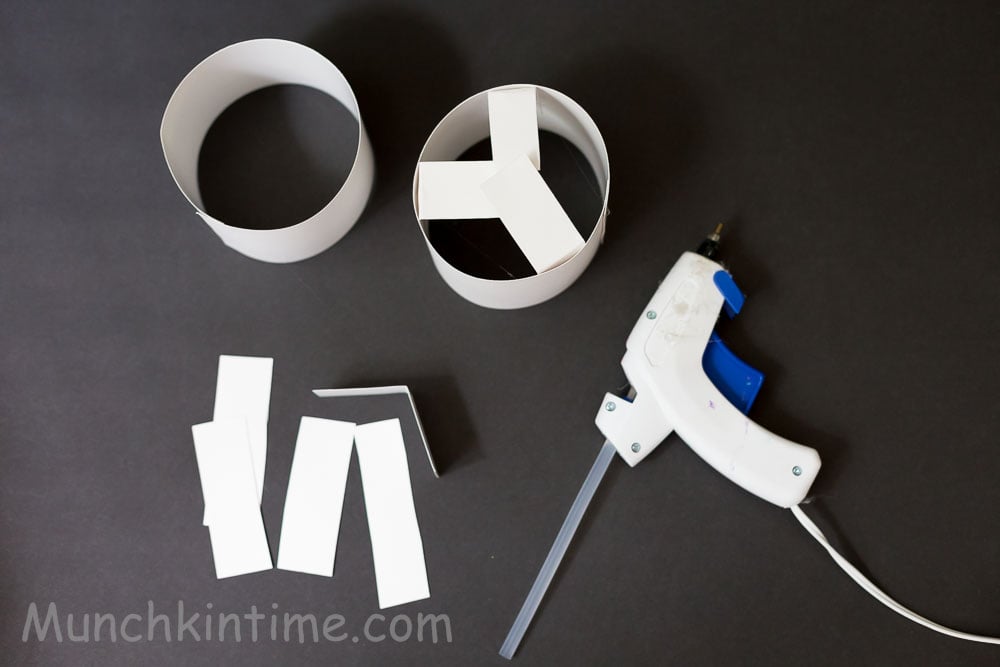
18. To make a cover for the top of the head cut out a circle and 3 strips of cardboard. 19. Using a hot glue glue it to the inside of the head.
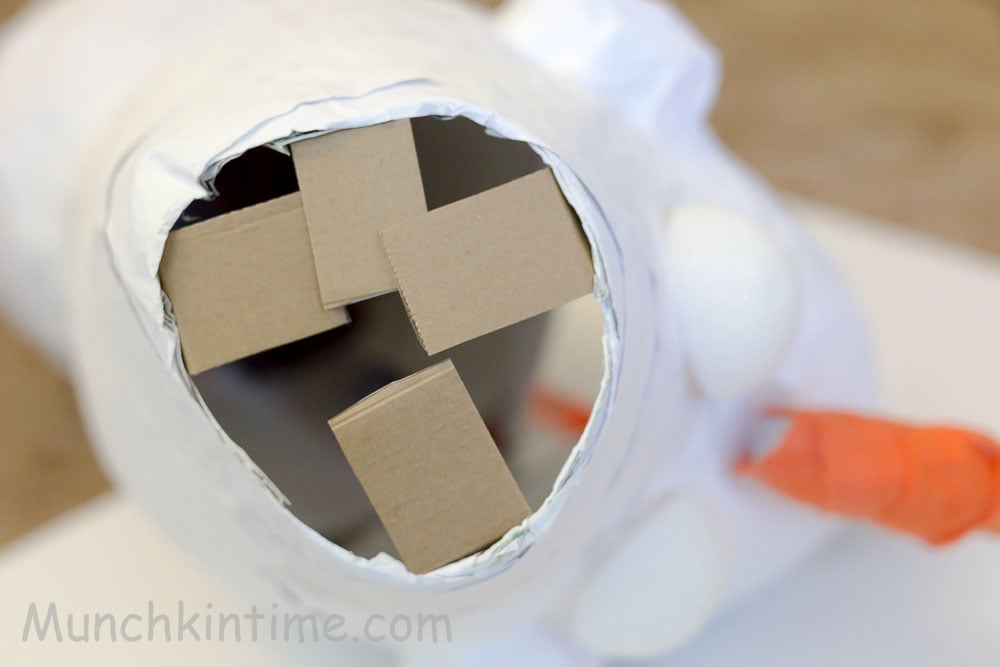
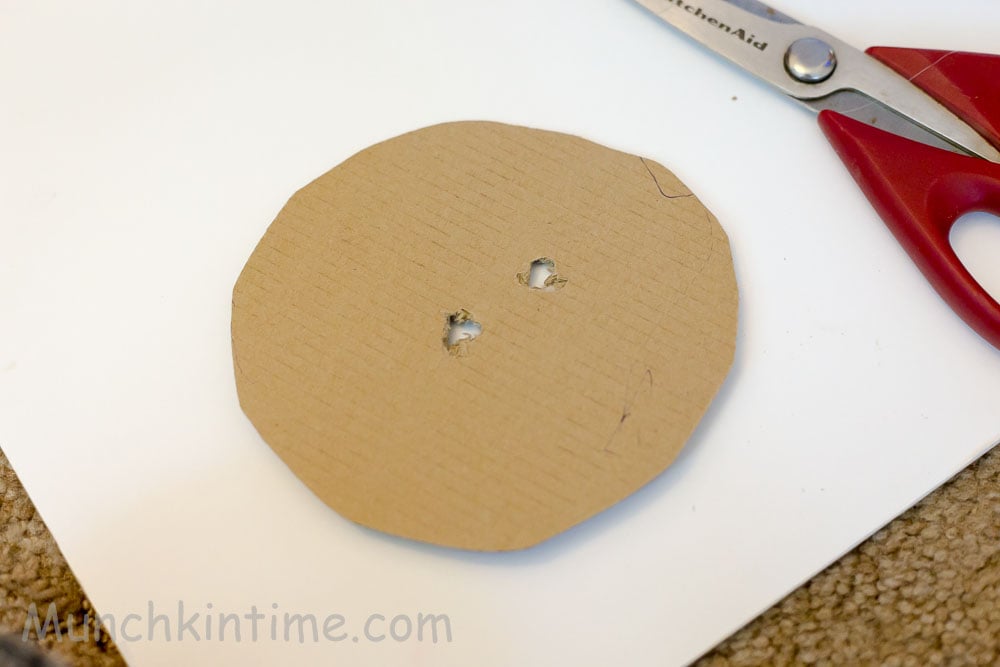
20. Make a hole then glue it to the top of Olaf's head. (I accidentally make two holes)
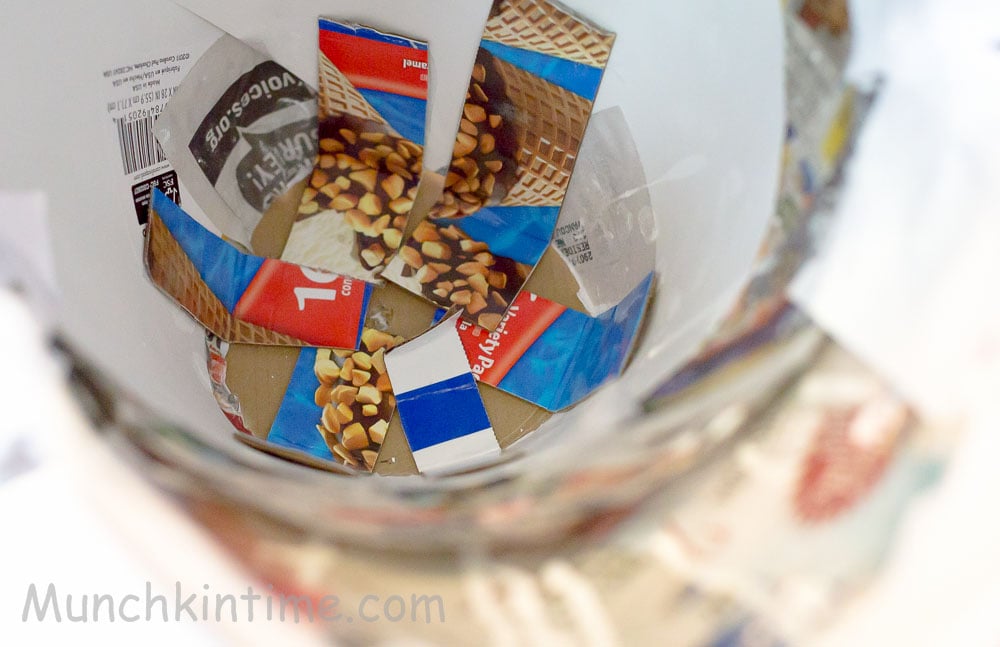
This is how it looks inside.
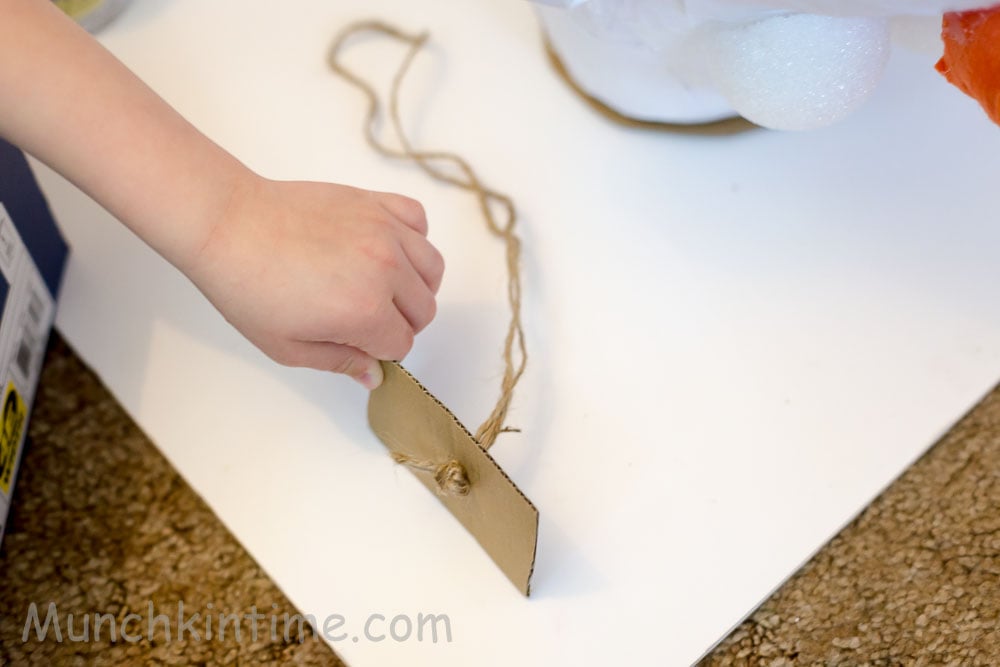
21. Cut out a square shape cardboard make a hole and knot a string thru it.
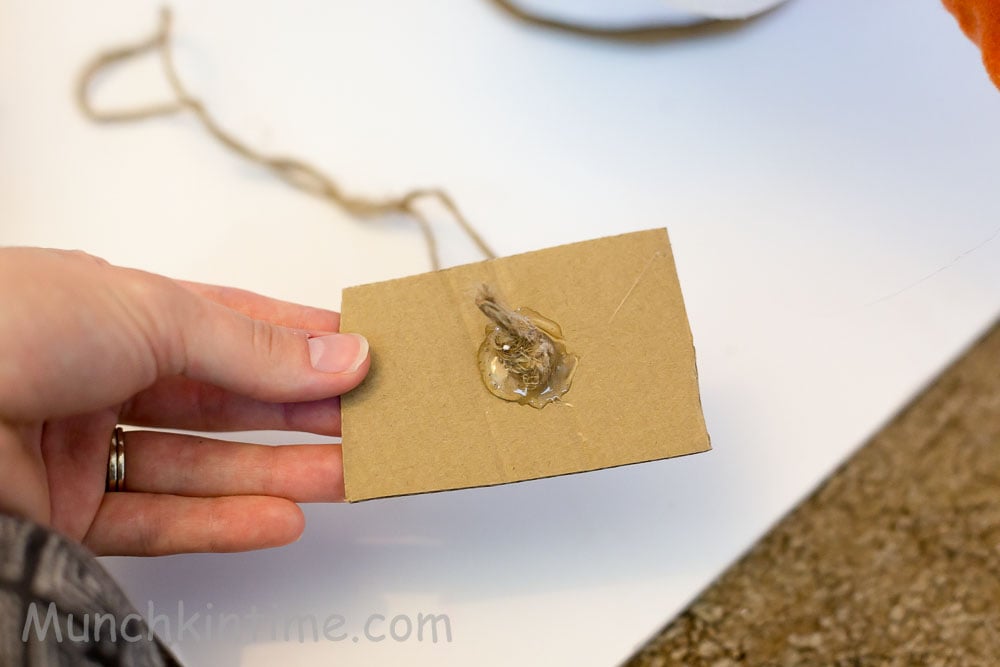
22. Add some hot glue.
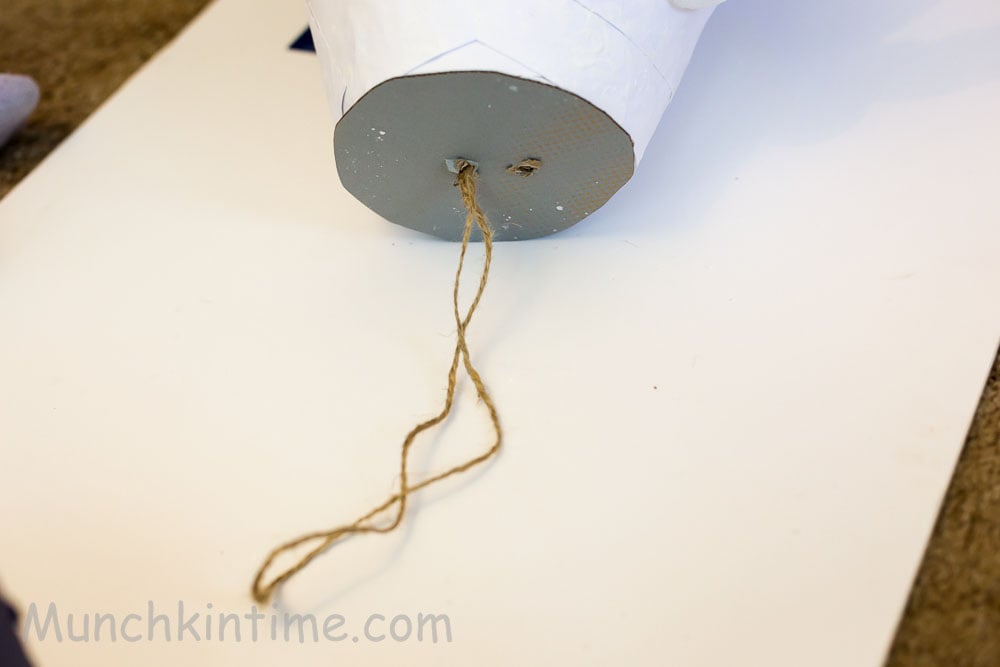
23. Add the string from inside of the head.

23. To attach Olaf's body parts cut out cardboard paper strips and glue them to the inside.24. Add hot glue on top of the strips and attach it to Olaf's head and hold it until glue cools off. Mod Podge the neck with white paper.25. Using cardboard make two hands and glue them to Olaf's body.

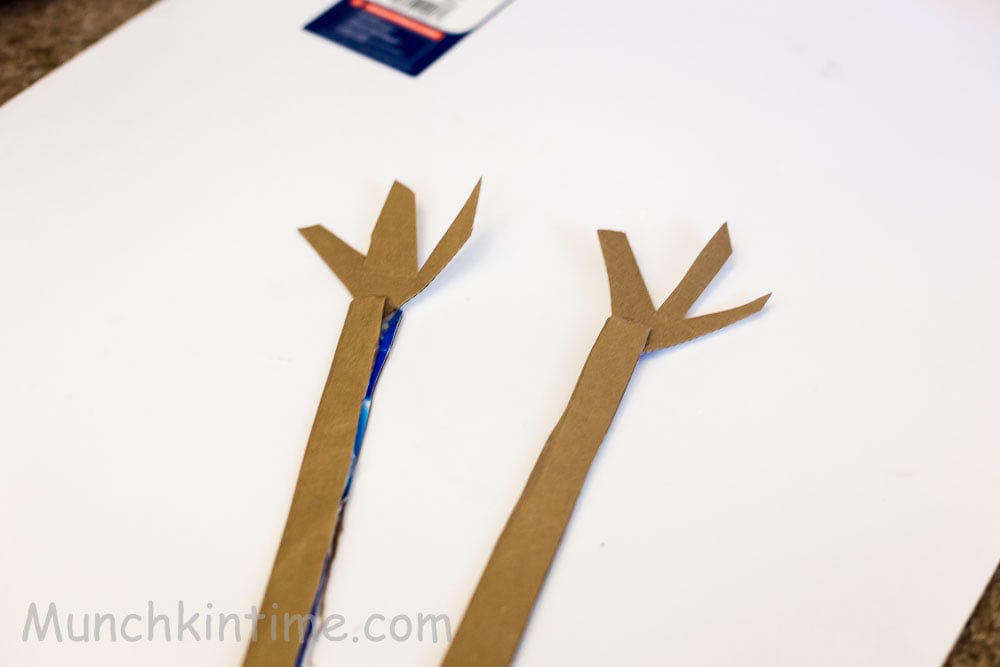
Glue small tree branches to the top of Olaf's head
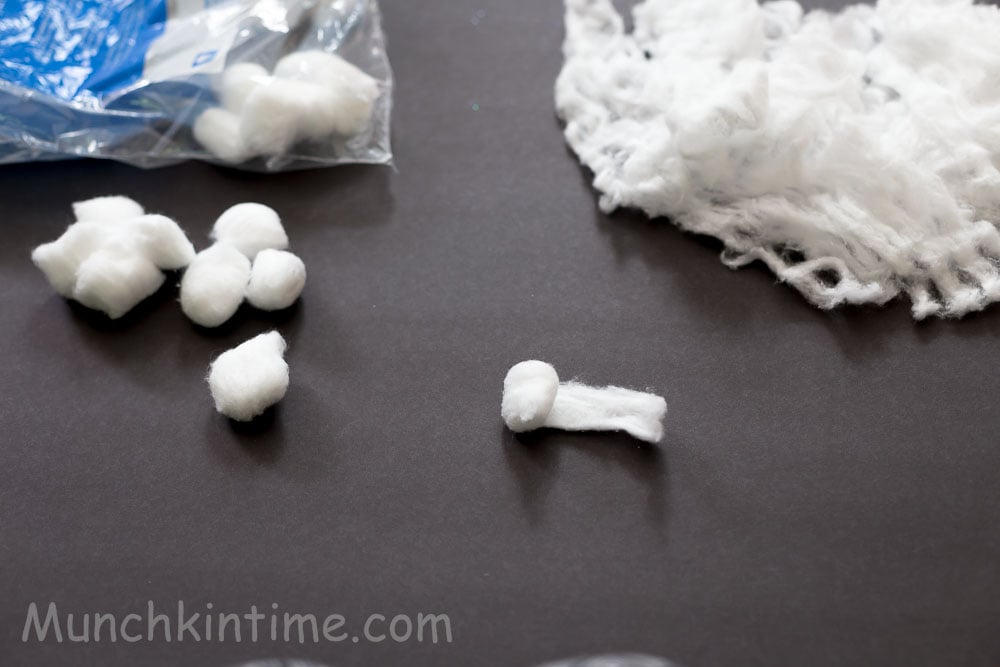
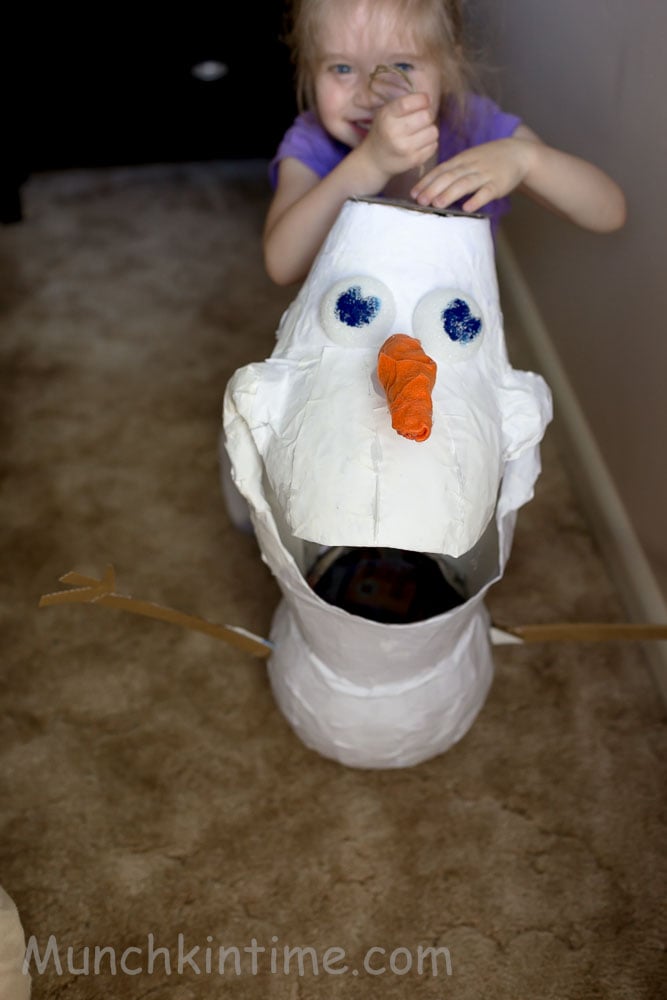
To decorate Olaf unroll cotton balls.
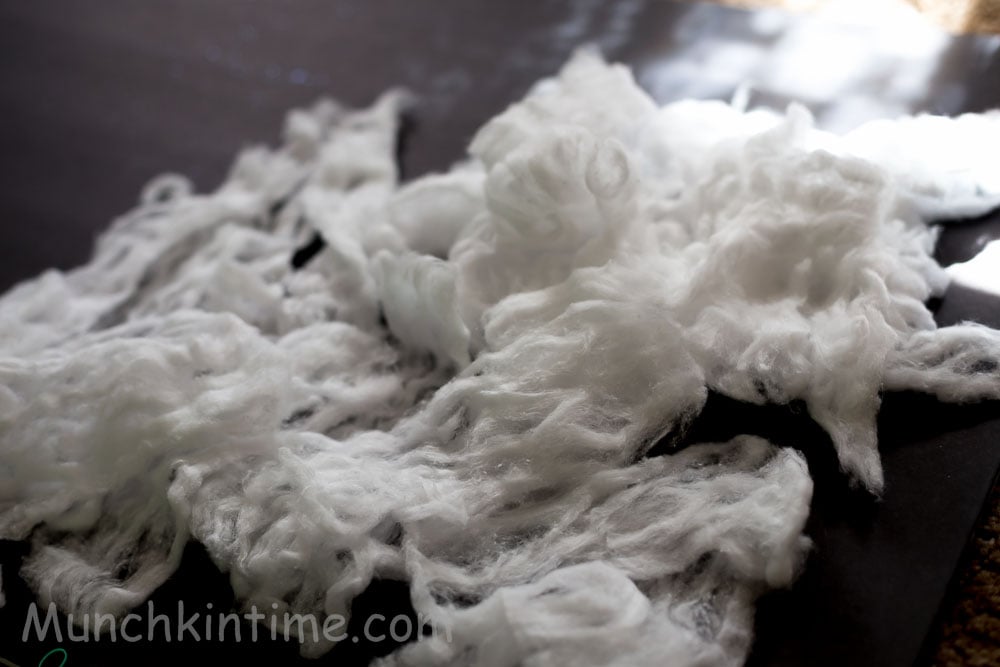
Lots of them.
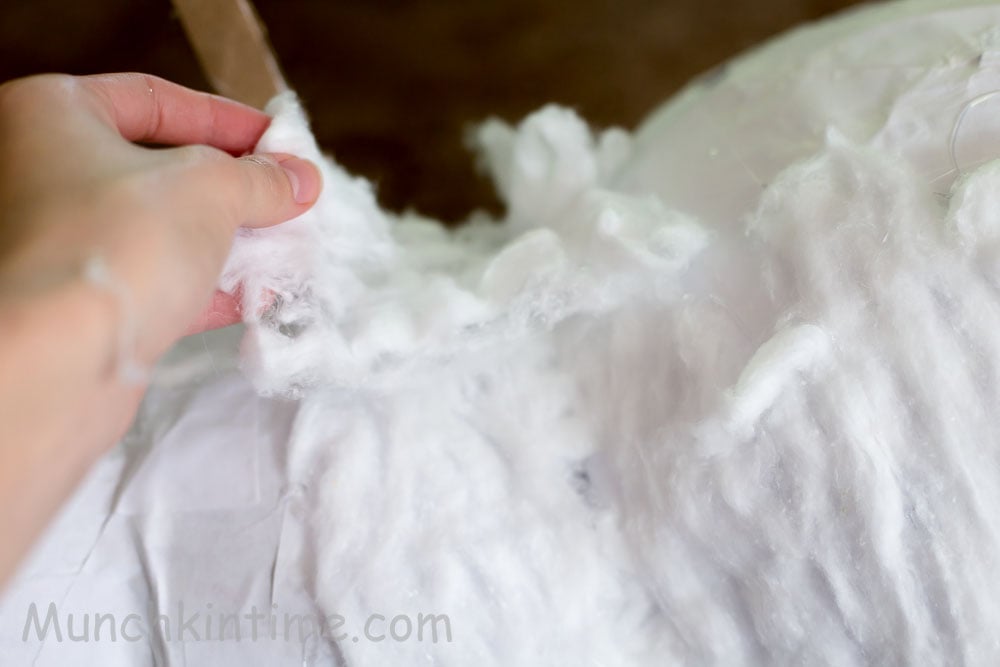
Cover Olaf's body with cotton using hot glue gun.

To make legs cut two poster strips and glue two sides together.
Glue small strips to inside of the leg.
Add more glue on top of the strips then glue them to Olaf's lower body then finish covering Olaf's body with cotton.
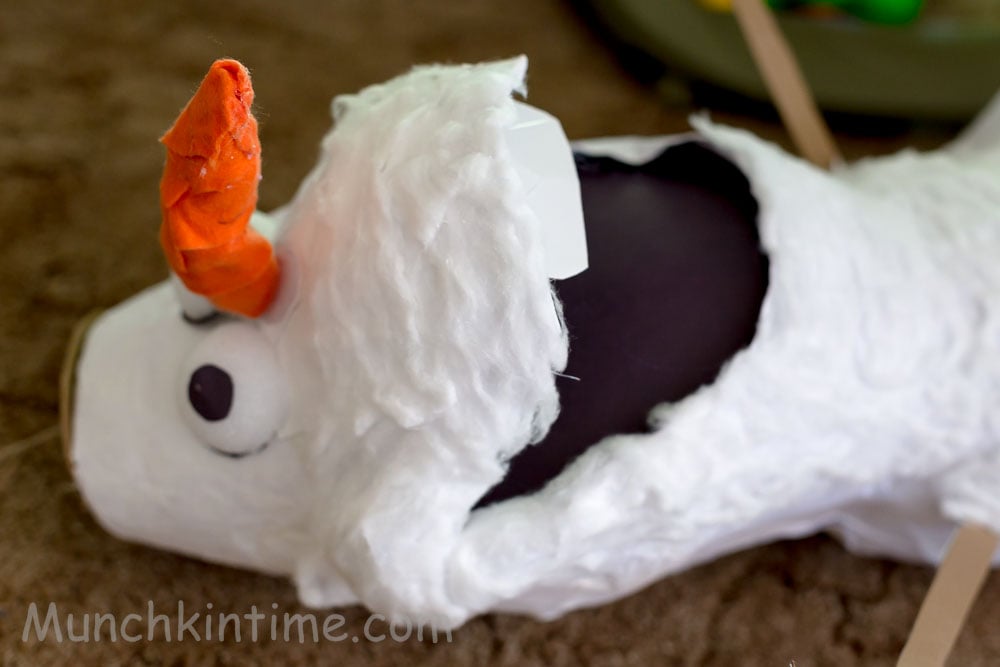
Glue white rectangle shape paper to the top of Olaf's mouth and black piece of paper to the bottom of Olaf's mouth to cover his insides.
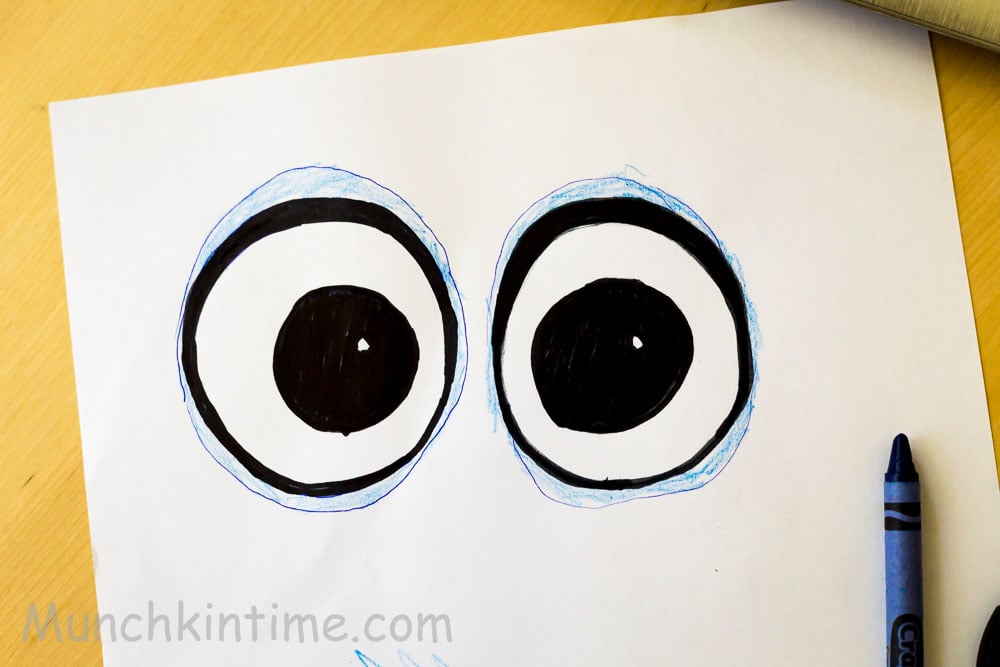
Draw two big eyes and glue them to Olaf's head.
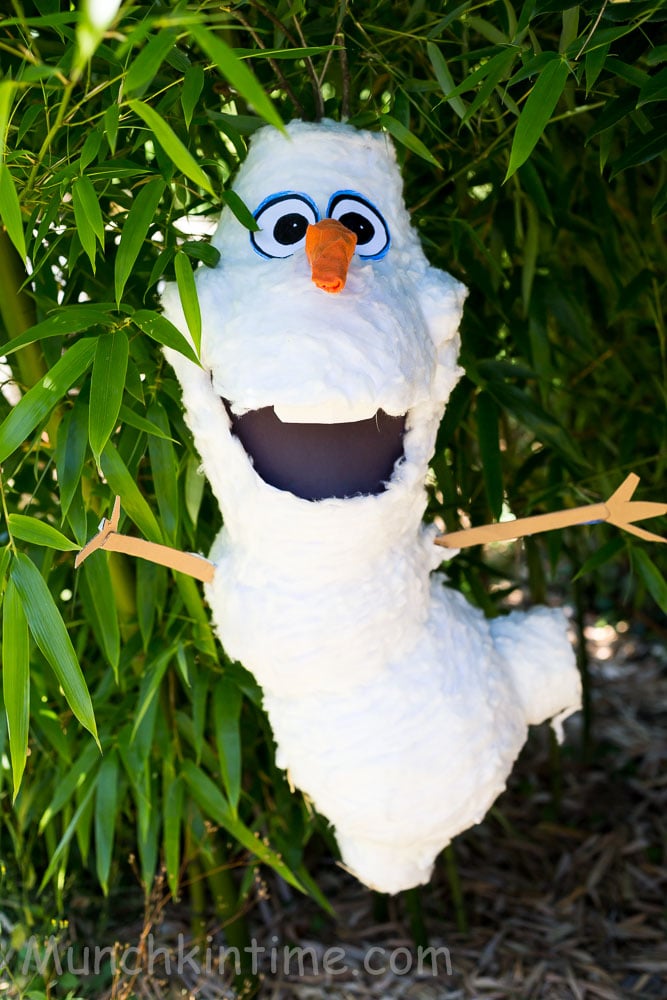
I forgot to add eyebrows and Olaf's buttons =(
I hope you liked this tutorial.
If you make Frozen Olaf Pinata please tag my name @munchkintimeblog or #munchkintimeblog on Instagram, I would LOVE to see your creations!
Let me know if you have any questions.
Thank you for stopping by!
Quote of the Day
Good morning! I have the piñata almost ready, but I don't understand where it will break and go out the candy, I want to be sure before gluing all parties! I hope you can answer soon, the birthday is tomorrow !!! thank you very much!!
Good Morning Marina! I placed candy in the stomach and when we were breaking Olaf his neck broke, so we just flipped him while kids were holding their hands to catch the candy. I hope that answers your question. I would recommend cutting out little hold on the bottom of his stomach (middle part of his body) and not gluing the bottom to much that way kids can break the bottom first then the candy can fall thru the bottom of the middle part of his body. I hope that helps.
Hi! I'm from Croatian! Radim birthday gift my little kumi.Tebam help! I wonder how you cut out the smaller and larger part of the body and merged. That part of me is not very clear. Pre'm very grateful. Ivana
Hi Ivana! For the smaller and larger part of the body I just used balloons and newspaper, and mod podged newspaper strips on the balloon. Then I let it dry for one night. So no need to cut anything for the smaller and larger part of the body. I hope that answers your question.
Sorry I 'm not well explained . How to connect the head and neck and neck with the body that you 're part of the cut that you can get the form of Olaf. A little coiled shape . For how to connect if you do not cut off part of which connect parts of the body . Of course this is all patched up with hot glue . I hope I have now with my bad English a little better explained . how to connect the pieces and get a little rolled up Olaf. Thanks again !
Hi Ivana, I cut out 3 strips and hot glued half of the strips on the inside edge of the mold. I waited tell it cooled then add some more hot glue to the other half of the strips and glue the whole mold to the head. I hope that explains how to attach neck to the body.
You've got such an eye for beautiful things and it shows beautifully in your pictures! I love the choice of light and how you arrange your photos! Just truly awesome, good job!
And this Olaf pinada, my kids would die if they got on for their birthday)))
Wow, thank you so much Marina for such a sweet comment. Yes my daughter had so much fun Helping me to make this Olaf Pinata and taking pictures with him!
About pictures I can say same thing about you dear, your pictures should be in the food magazines. Every time I see them on Instagram, I can't stop looking at them! You are an amazing food stylist and photographer!
Thank you very much for sharing that beautiful piñata. I'm making one for my friend's Daugther
Hope it'll be come nice!!
Cheers,
Michela
Thank you for stopping by Michela! I hope it will turn out beautifully for you! Just make sure to take some time. Also share your creation with us by tagging #munchkintimeblog on Instagram! Good luck! =)
very nice for a surprise (not used as pinata) i hope it will come out as well as yours
we are in the process of making this right now and just realized that you dont mention which portion of the body the candy will be in...since the middle isnt open to the bottom portion...
Hi Dana, we placed our candy in the stomach thru Olaf's mouth. I hope that helps!
That is the cutest thing! My little guy would love one!
Thank you Carlee! You should make one for him=)
How many days total did it take you?
About 3 days!
It looks like you changed the eyes. what did you first use for the eyes to make them stand out 3-dimensional before you put the colored eyes on?
I did used foam balls that I got from walmart! I didn't liked how they looked so I switched them to a paper ones!
how big are the strips of posterboard
Hi Alex! I believe they were 21 inches by 7 inches.
How did you make your homemade modge podge?
I used Elmer's white glue and mixed it with water 1:1 ration in one words 50% glue mix with 50% water.
That's what I did too! mine is different than this slightly but,came out great! Thanks for this!
Thank you Kristel! I bet kiddos loved your Olaf Pinata!
This is fabulous! I love it. Pinned and tweeted. Thanks for being a part of our party! I hope you stop by on Monday at 7 pm. We love to party with you. Merry Christmas! Lou Lou Girls
How many layers of news paper and white paper did you use? I want to make sure mine is sturdy but not too sturdy.
HI Ashley! I remember doing 2 layers of newspaper - one layer when covering each balloon and then letting them dry, and 2nd layer when connecting balloons together, as for white paper I believe I only did one layer just to cover newspaper. Hope that helps.
How long did it take to dry
It took around 24 hours to dry.
I'm about to start making this but was wondering how sturdy your pinata was. How many hits did it take before it broke and how much candy did you put inside it?
Hi Angie! My pinata was quite sturdy so it took awhile to break it. I think it depends on how many layers of paper you are going to mod podge to the body. I fill half of Olaf's middle stomach. I hope this helps.
At which point and into which cavity did you put the candy?
Great tutorial! Thanks!
Thank you Natalie! You can add candy at the end by placing them thru Olaf's mouth into his stomach.