
If you’ve ever wanted that crispy, golden chicken katsu but didn’t feel like dealing with hot oil splattering everywhere… same. That’s exactly why this air fryer chicken katsu has been on repeat in our house lately.
It’s everything you want—super crispy outside, juicy inside—but way easier and less messy. And if you’ve never tried making it with chicken thighs, you’re in for a treat. They stay extra juicy and honestly might be even better than the classic version.
This is one of those recipes that feels a little “special” but is actually super simple. Perfect for busy weeknights, picky eaters, or when you just want something comforting without a ton of work. If you are looking for more easy dinner recipes, check out our Easy Family Dinner Recipes.
Why You’ll Love This Recipe
- Easy air fryer recipe (no deep frying!)
- Crispy, crunchy texture
- Juicy chicken thighs every time
- Family-friendly and picky-eater approved
What Is Chicken Katsu?
Chicken katsu is a Japanese breaded chicken cutlet coated in panko breadcrumbs and traditionally deep-fried. This air fryer chicken katsu recipe gives you the same crispy texture with less oil and way less mess.
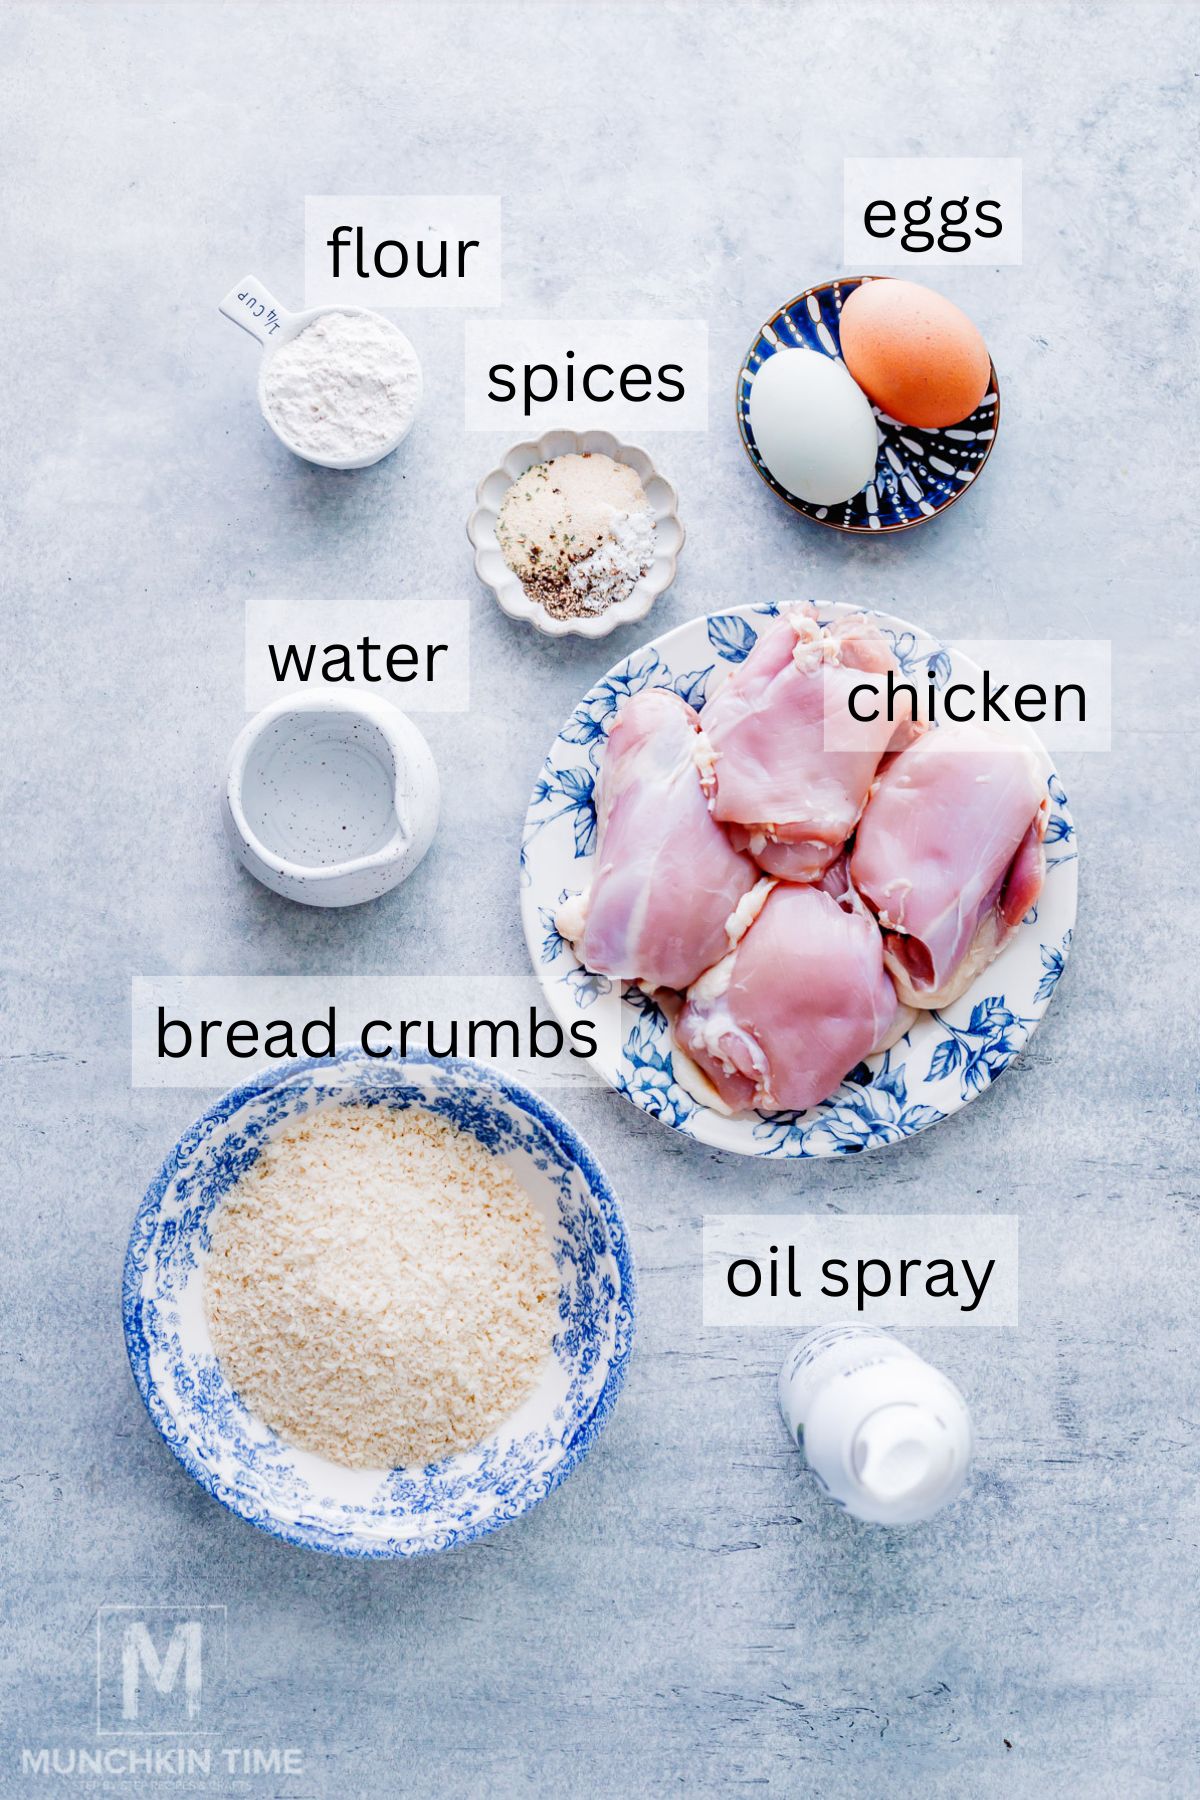
Ingredients You’ll Need
Let’s keep this simple—nothing fancy here, just pantry staples that come together to make the crispiest, juiciest air fryer chicken katsu.
Air Fryer Chicken Katsu
- Chicken thighs – I love using boneless, skinless chicken thighs here because they stay extra juicy and flavorful (no dry chicken)
- Salt & black pepper – Just enough to season the chicken before breading
- All-purpose flour – Helps the coating stick to the chicken
- Eggs – This is what gives you that perfect crispy layer when combined with the breadcrumbs
- Panko breadcrumbs – The key to that light, crunchy coating (so much better than regular breadcrumbs!)
- Oil spray – Just a light spray helps everything get golden and crispy in the air fryer
For the Quick Tonkatsu Sauce
- Ketchup – The base of the sauce
- Worcestershire sauce – Adds that savory, slightly tangy flavor
- Sugar – Just a little to balance everything out
For Serving
- Steamed rice – Perfect for soaking up all that sauce
- Shredded cabbage – Adds a fresh crunch on the side
Expert Tip
If you don’t have chicken thighs, you can totally use chicken breasts—but thighs really do give you that extra juicy, tender bite.
How to Make Air Fryer Chicken Katsu
This recipe comes together so easily, and once you make it once, it’ll quickly become a go-to.
Step 1. Start by prepping your cabbage. Just slice it and set it aside—you’ll use it later when serving, and it adds that perfect fresh crunch on the side.
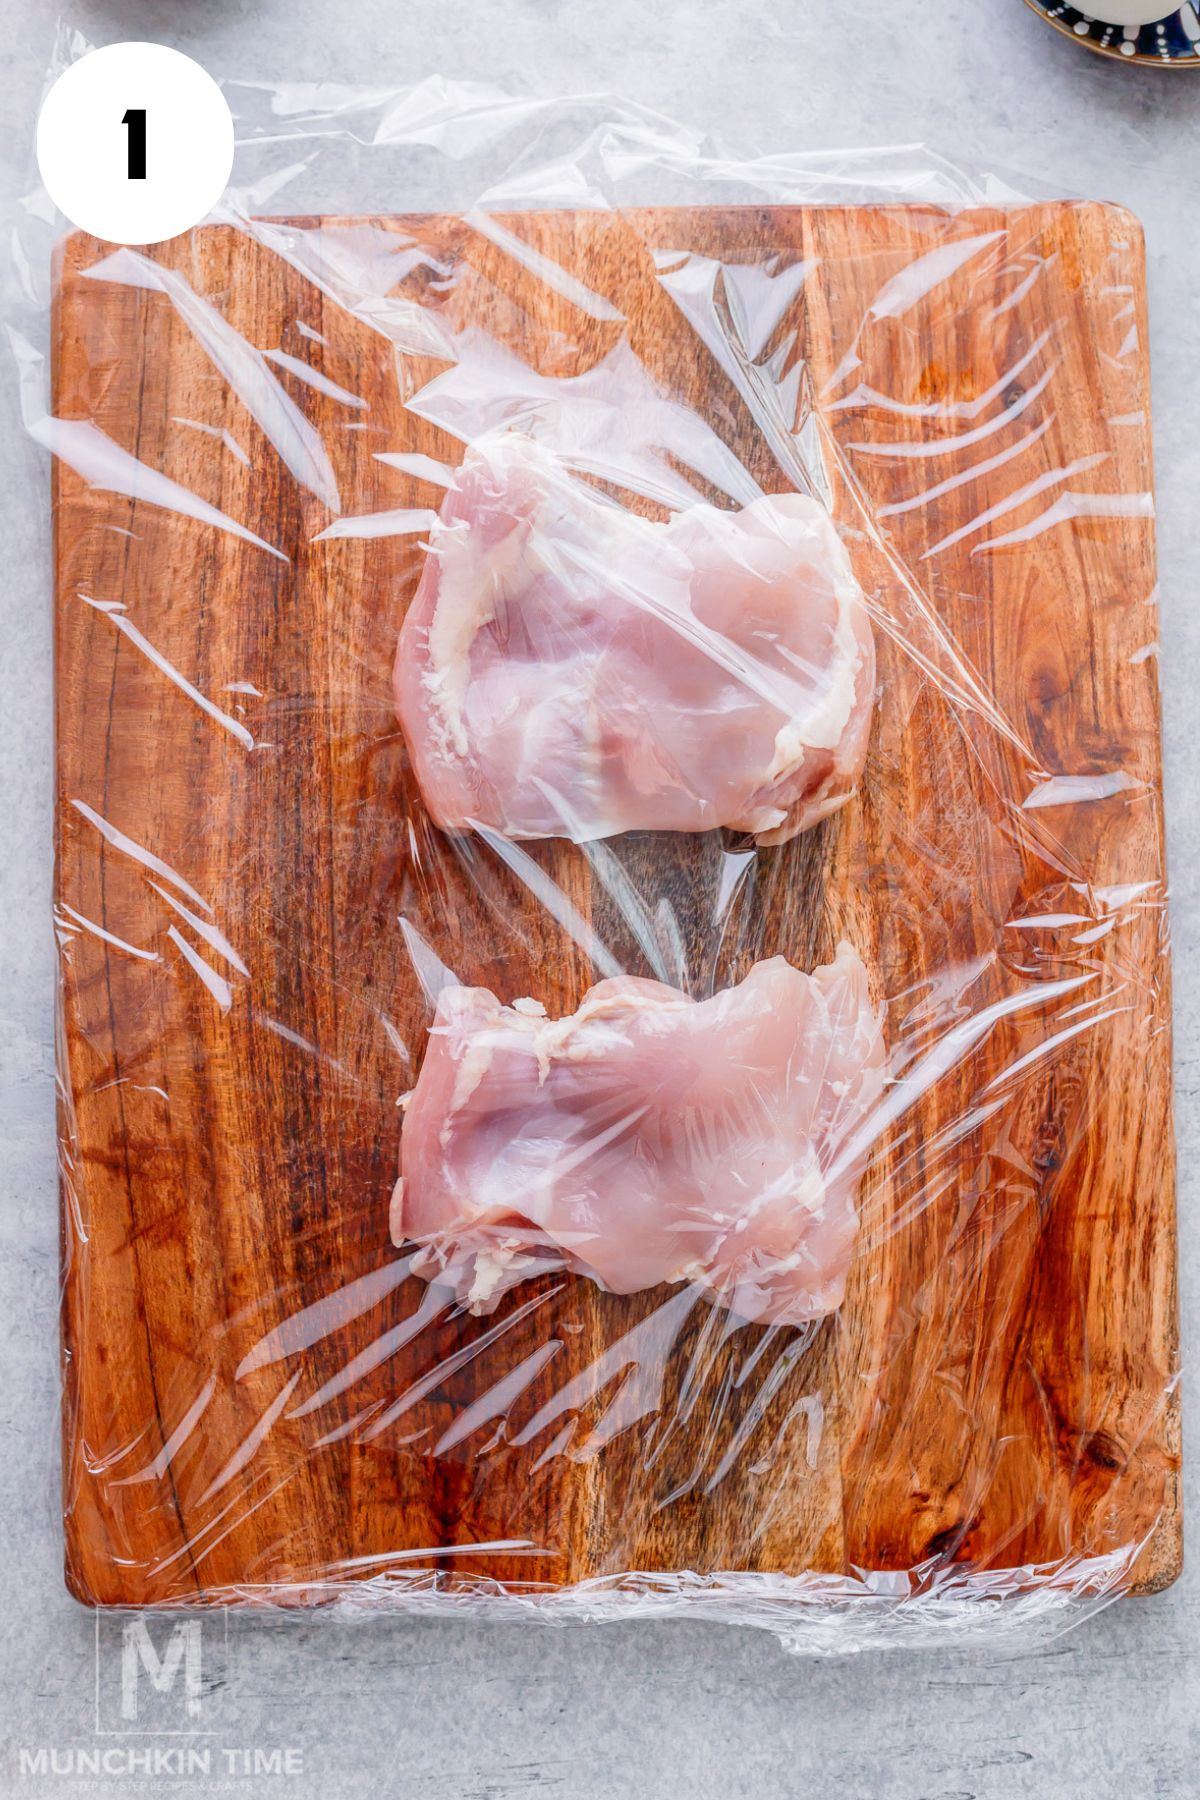

Step 2. Next, season your chicken thighs with salt and pepper on both sides. If they’re a bit thick, gently pound them to about ½-inch thickness so they cook evenly and stay nice and juicy. This step really makes a difference!
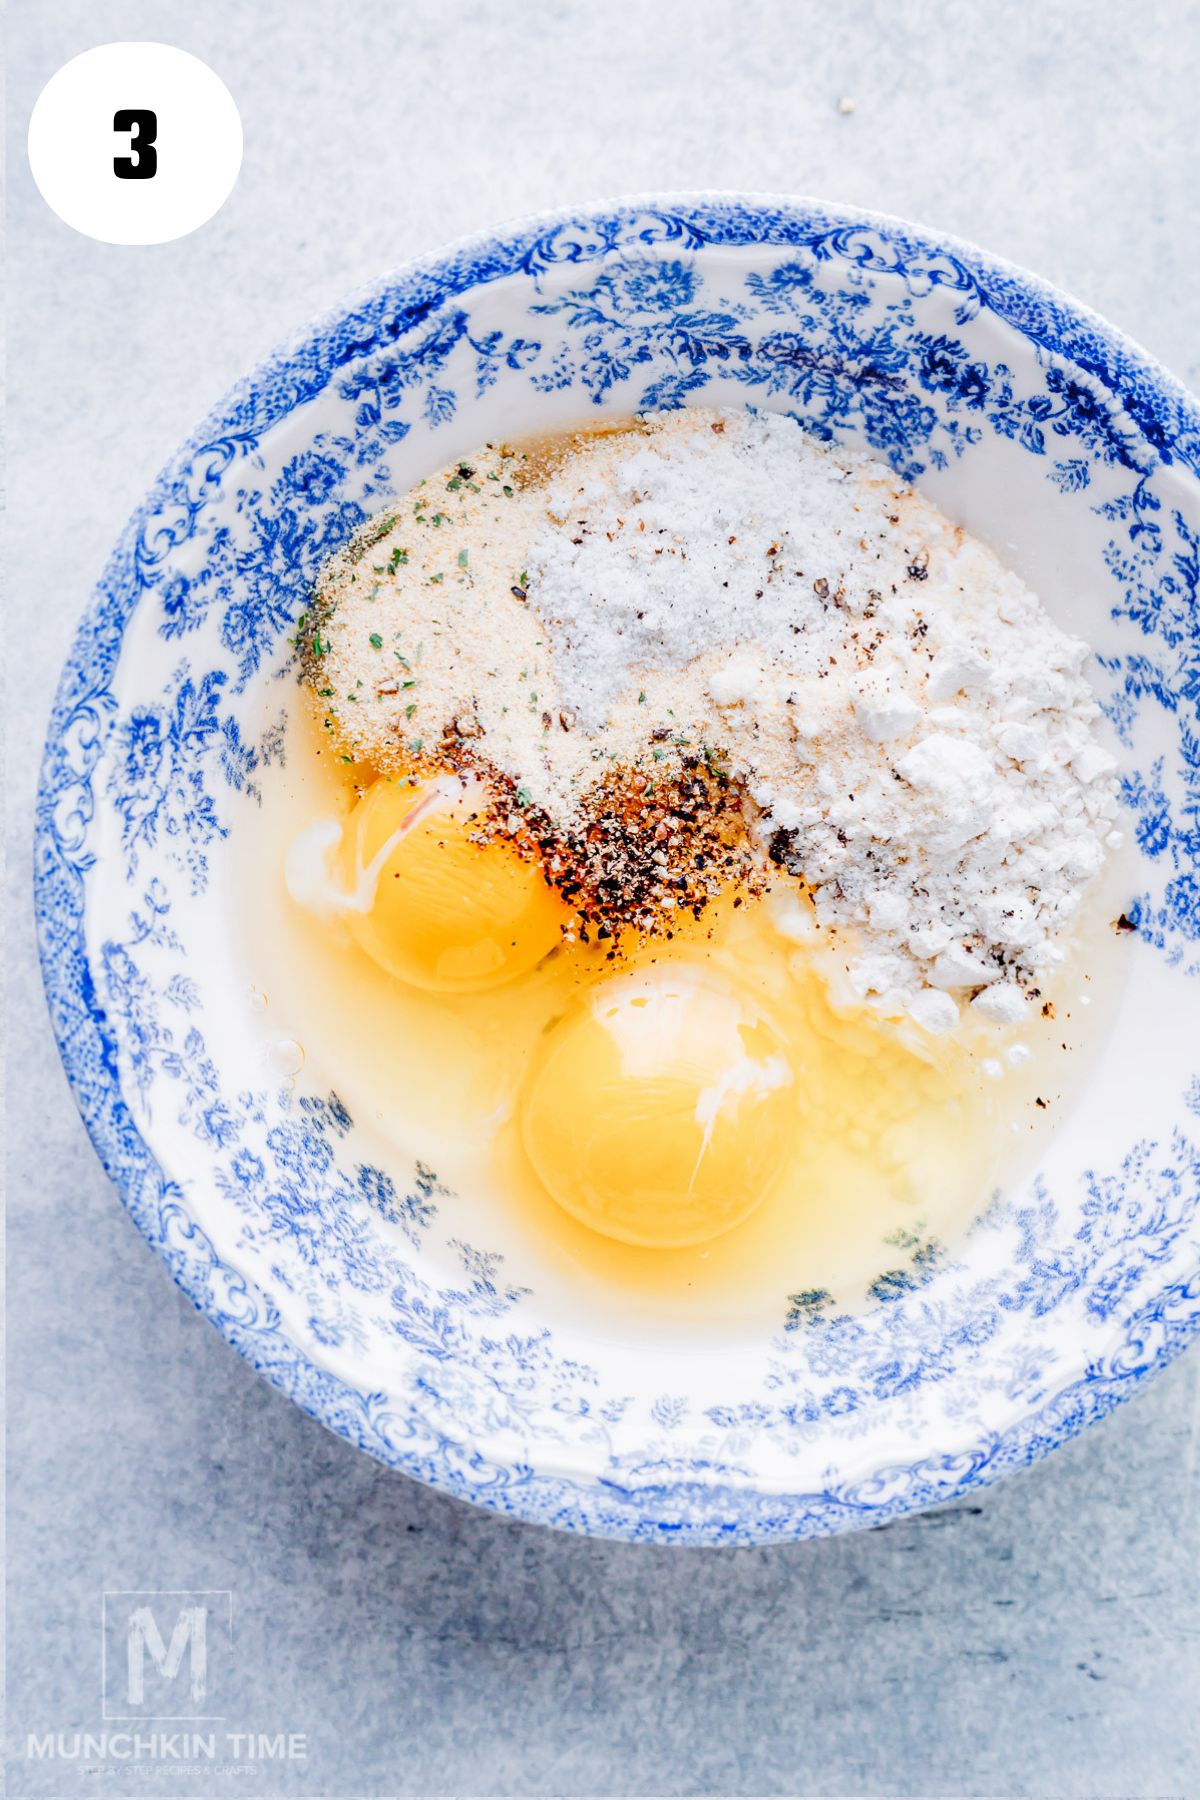
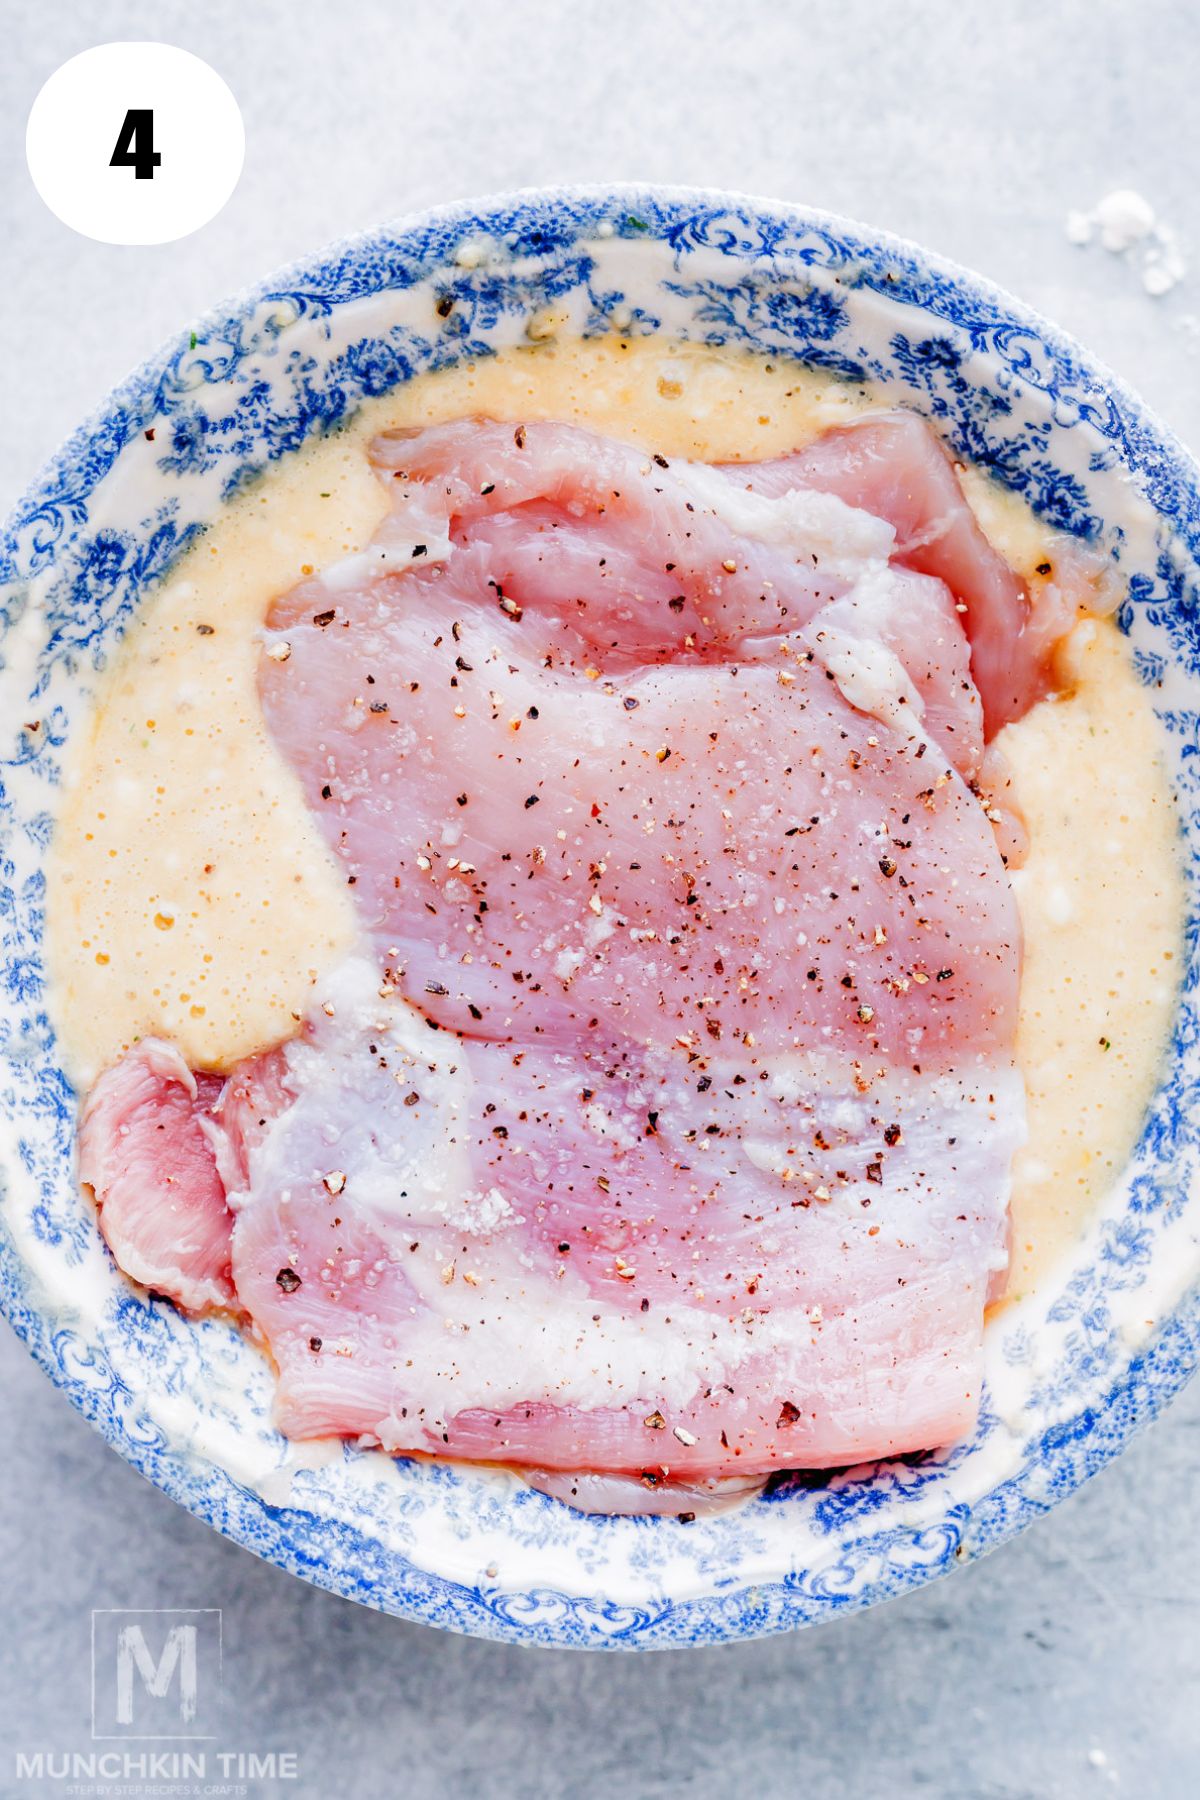
Step 3. In a bowl, whisk together the egg, flour, water, salt, pepper, onion and garlic powder until smooth. You’re looking for a slightly thick, batter-like consistency that will coat the chicken nicely.
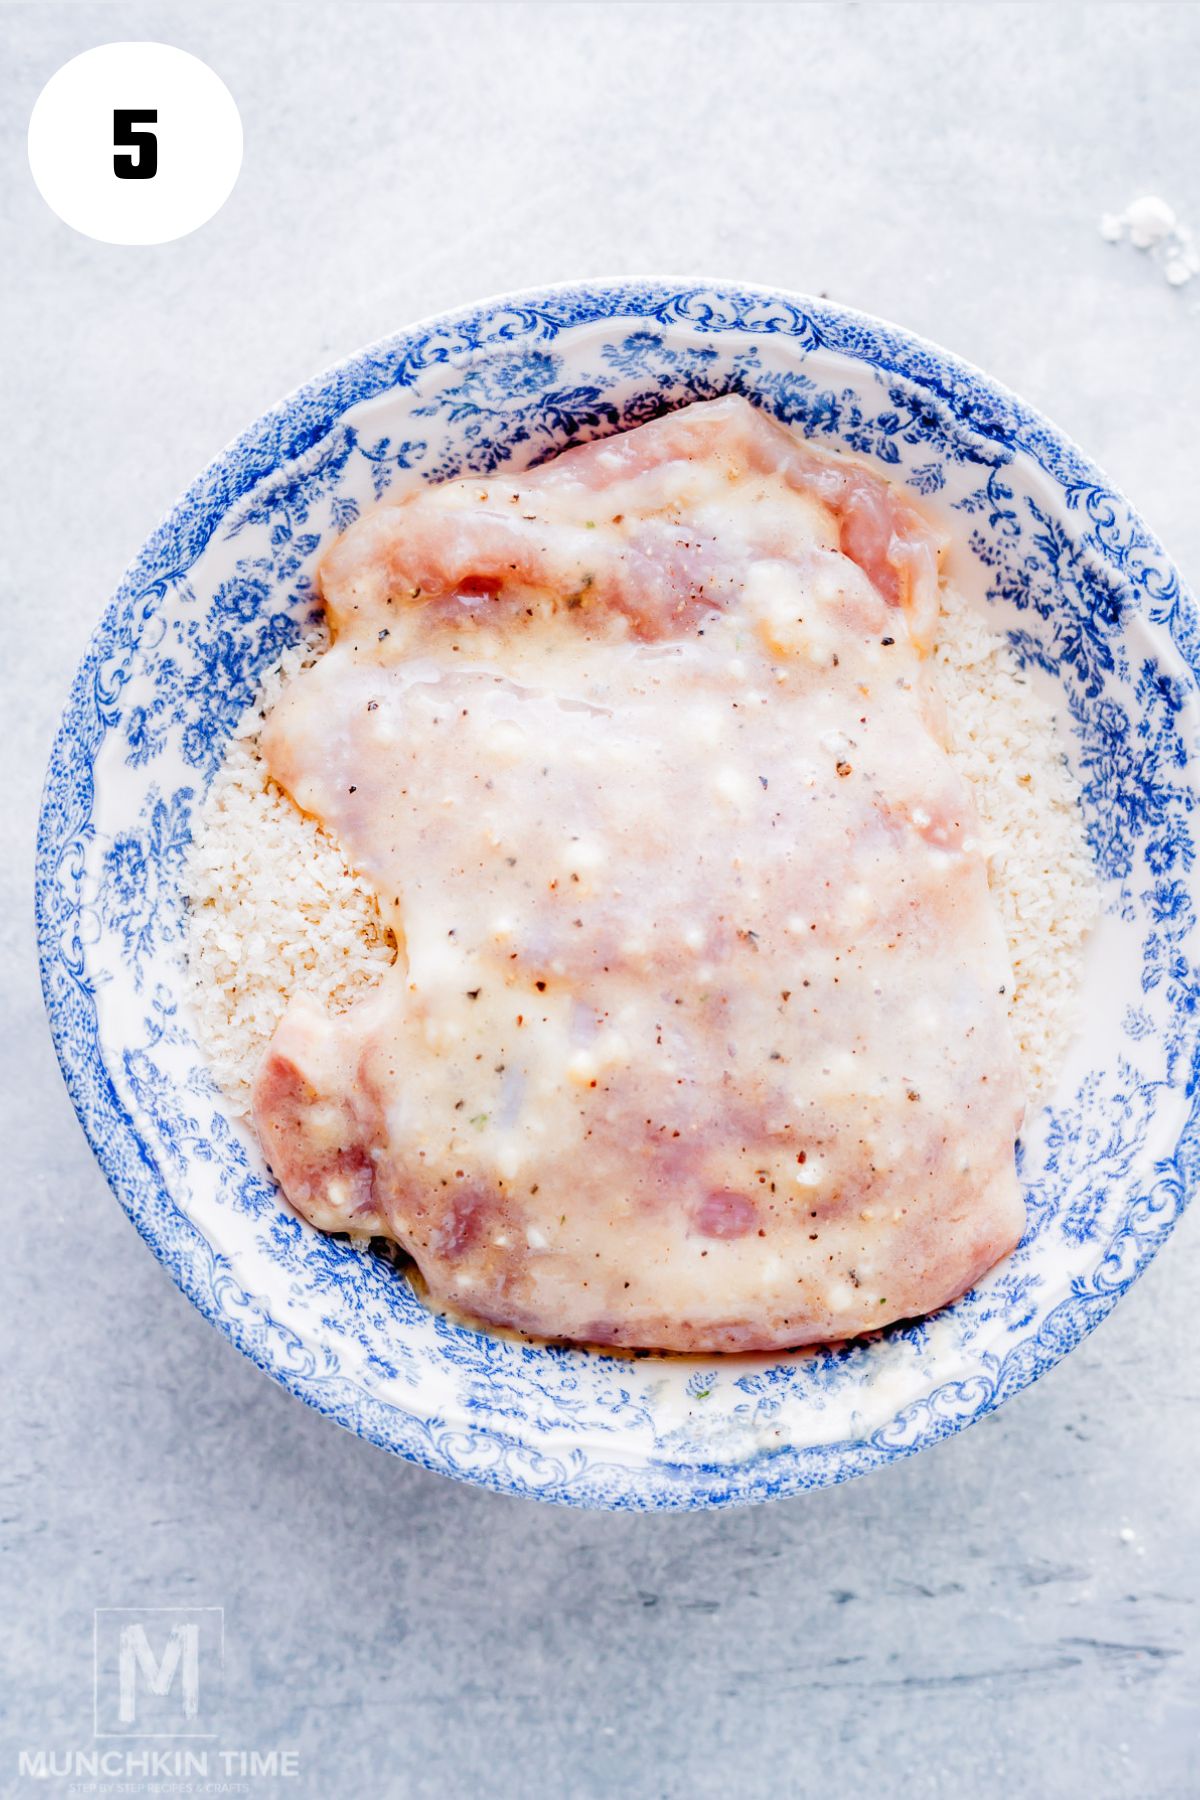
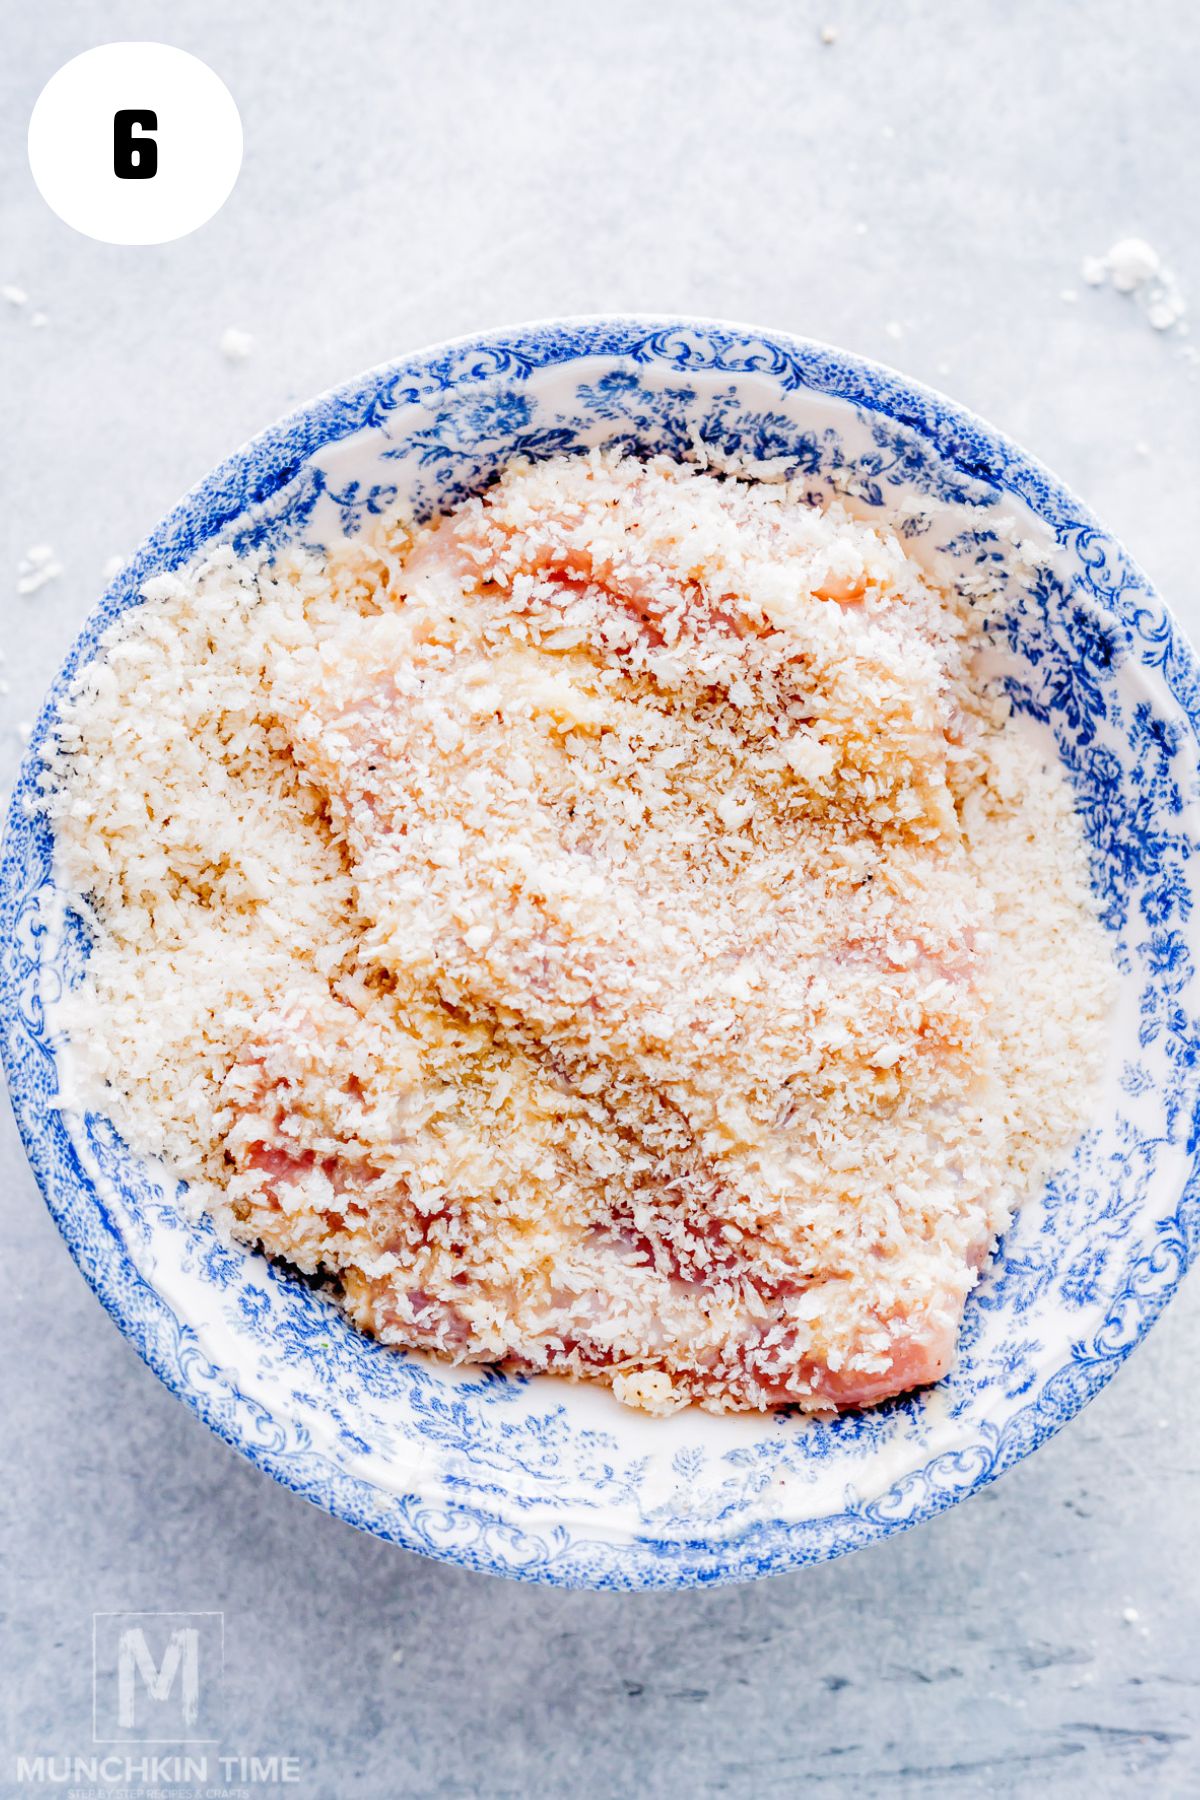
Step 4. Now for the coating. Pour the panko breadcrumbs onto a plate, then dip each chicken thigh into the batter, letting any excess drip off. Place it onto the panko and press gently so the breadcrumbs stick well and fully coat the chicken. Repeat with the remaining pieces.
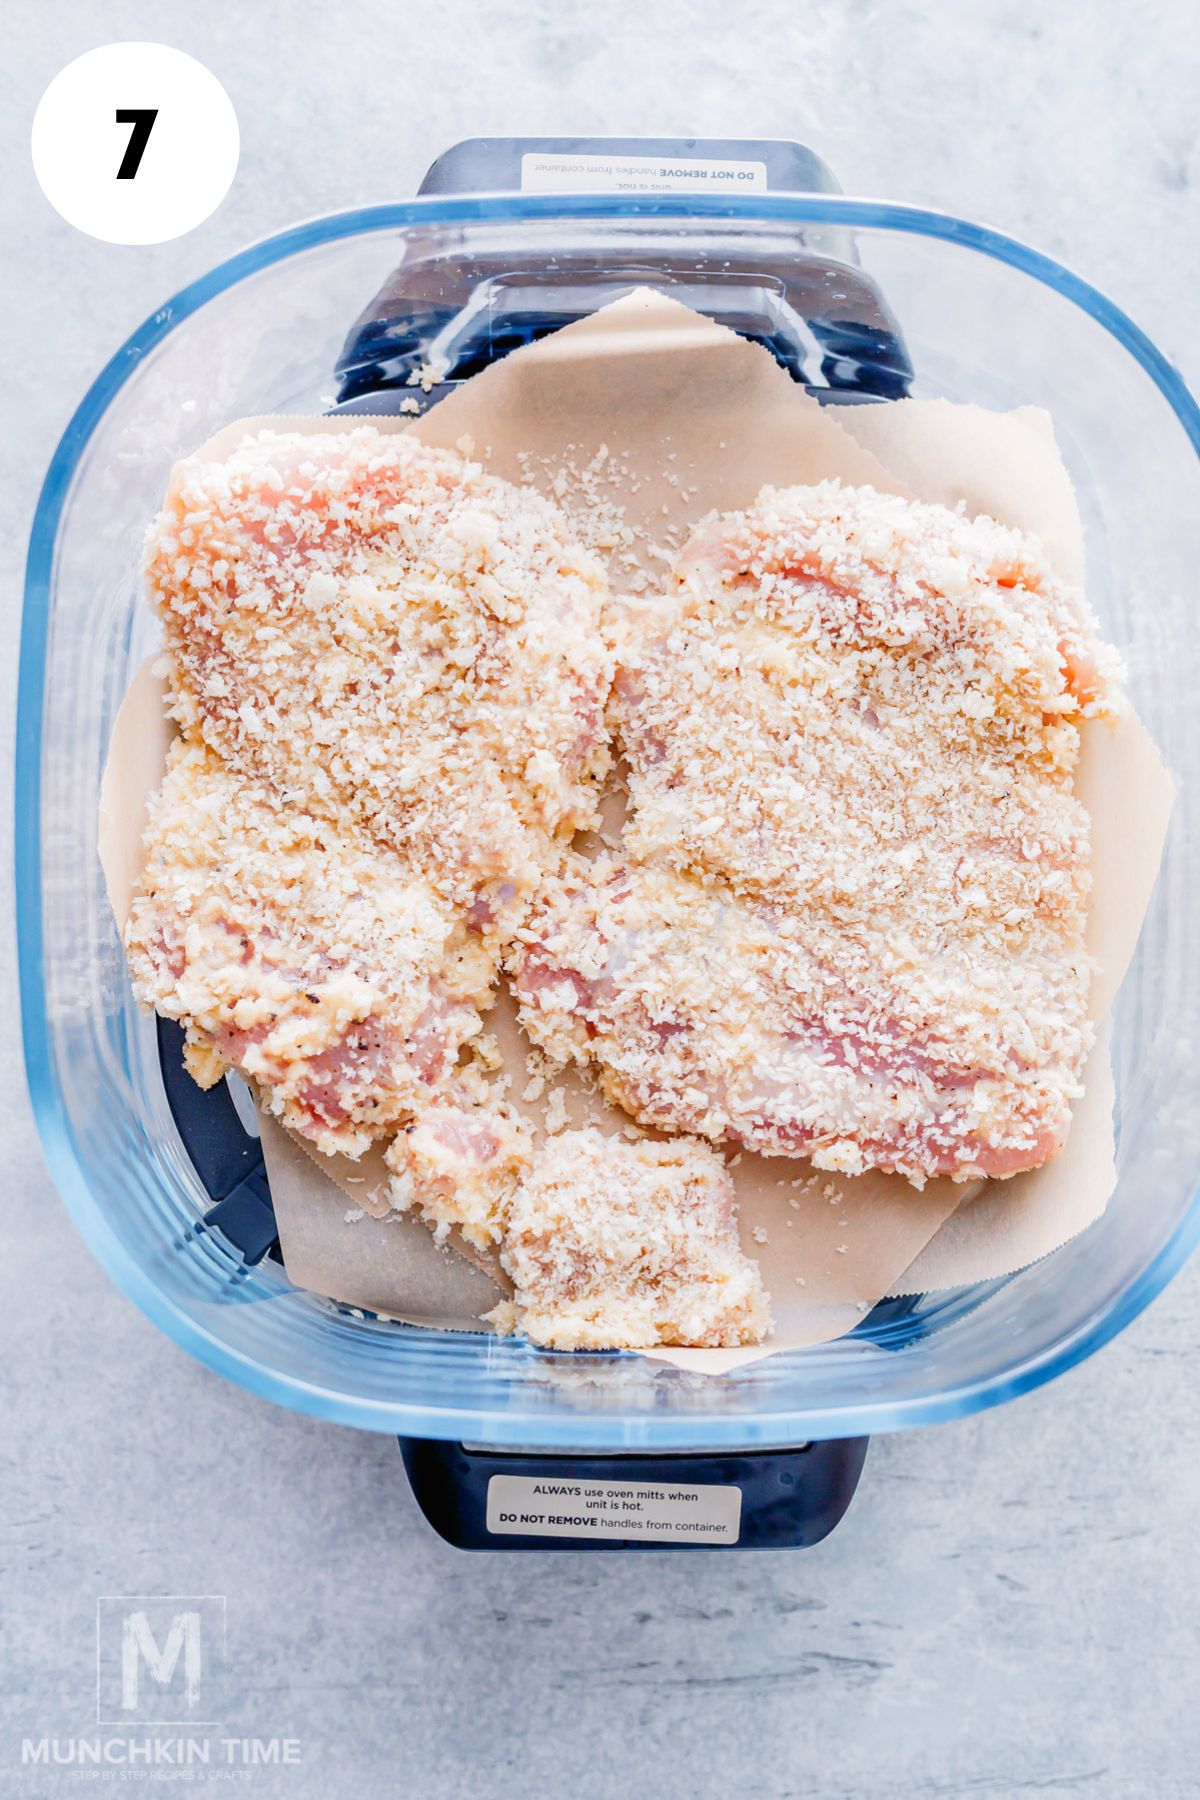
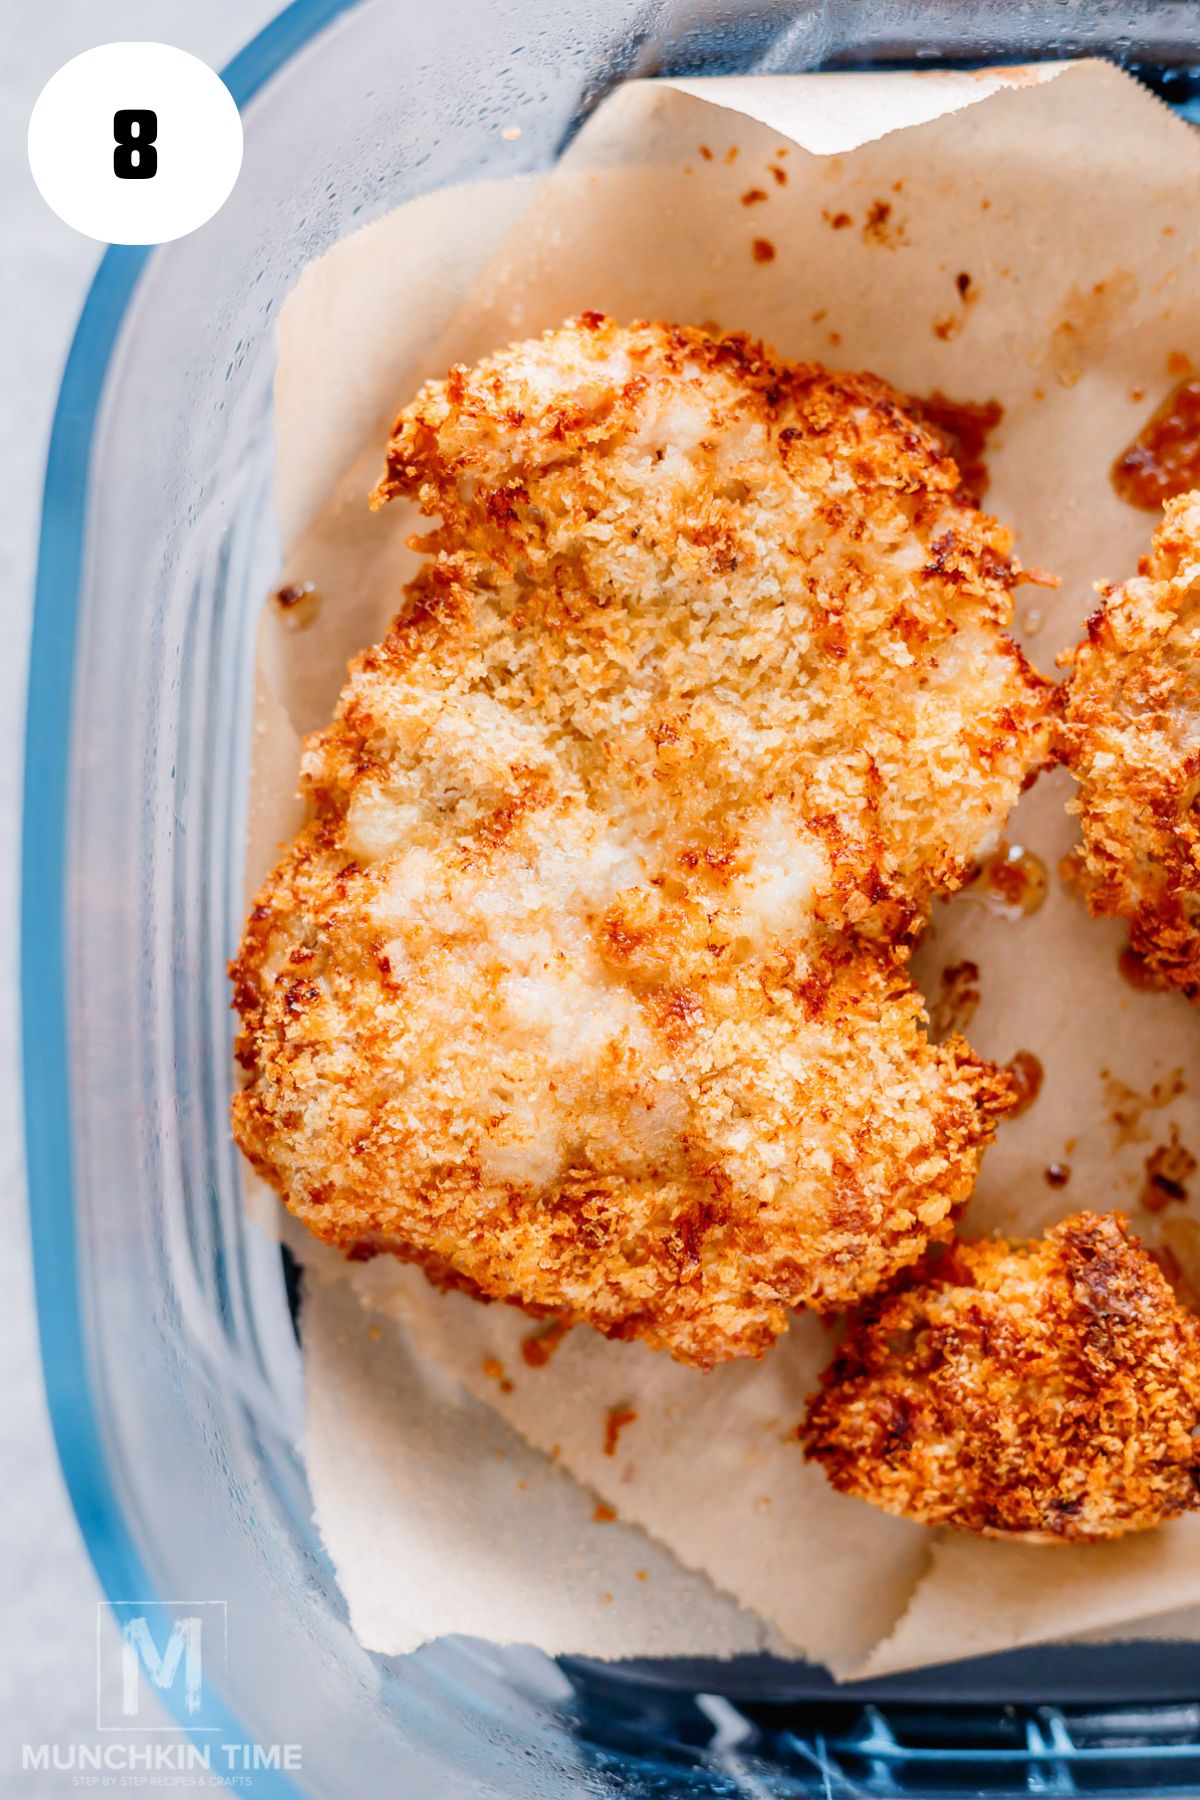
Step 5. Place the coated chicken into your air fryer basket in a single layer—this helps everything crisp up evenly. Give the tops a light spray of oil, which helps create that golden, crispy crust.
Step 6. Air fry at 360°F for about 10 minutes, then flip and cook for another 7–10 minutes, until the chicken is fully cooked through and beautifully crispy on the outside. Every air fryer is a little different, so keep an eye on it toward the end.
Step 7. While the chicken cooks, quickly mix together ketchup, brown sugar, Worcestershire sauce, garlic powder, and oyster sauce in a small bowl to make a simple, flavorful katsu sauce.
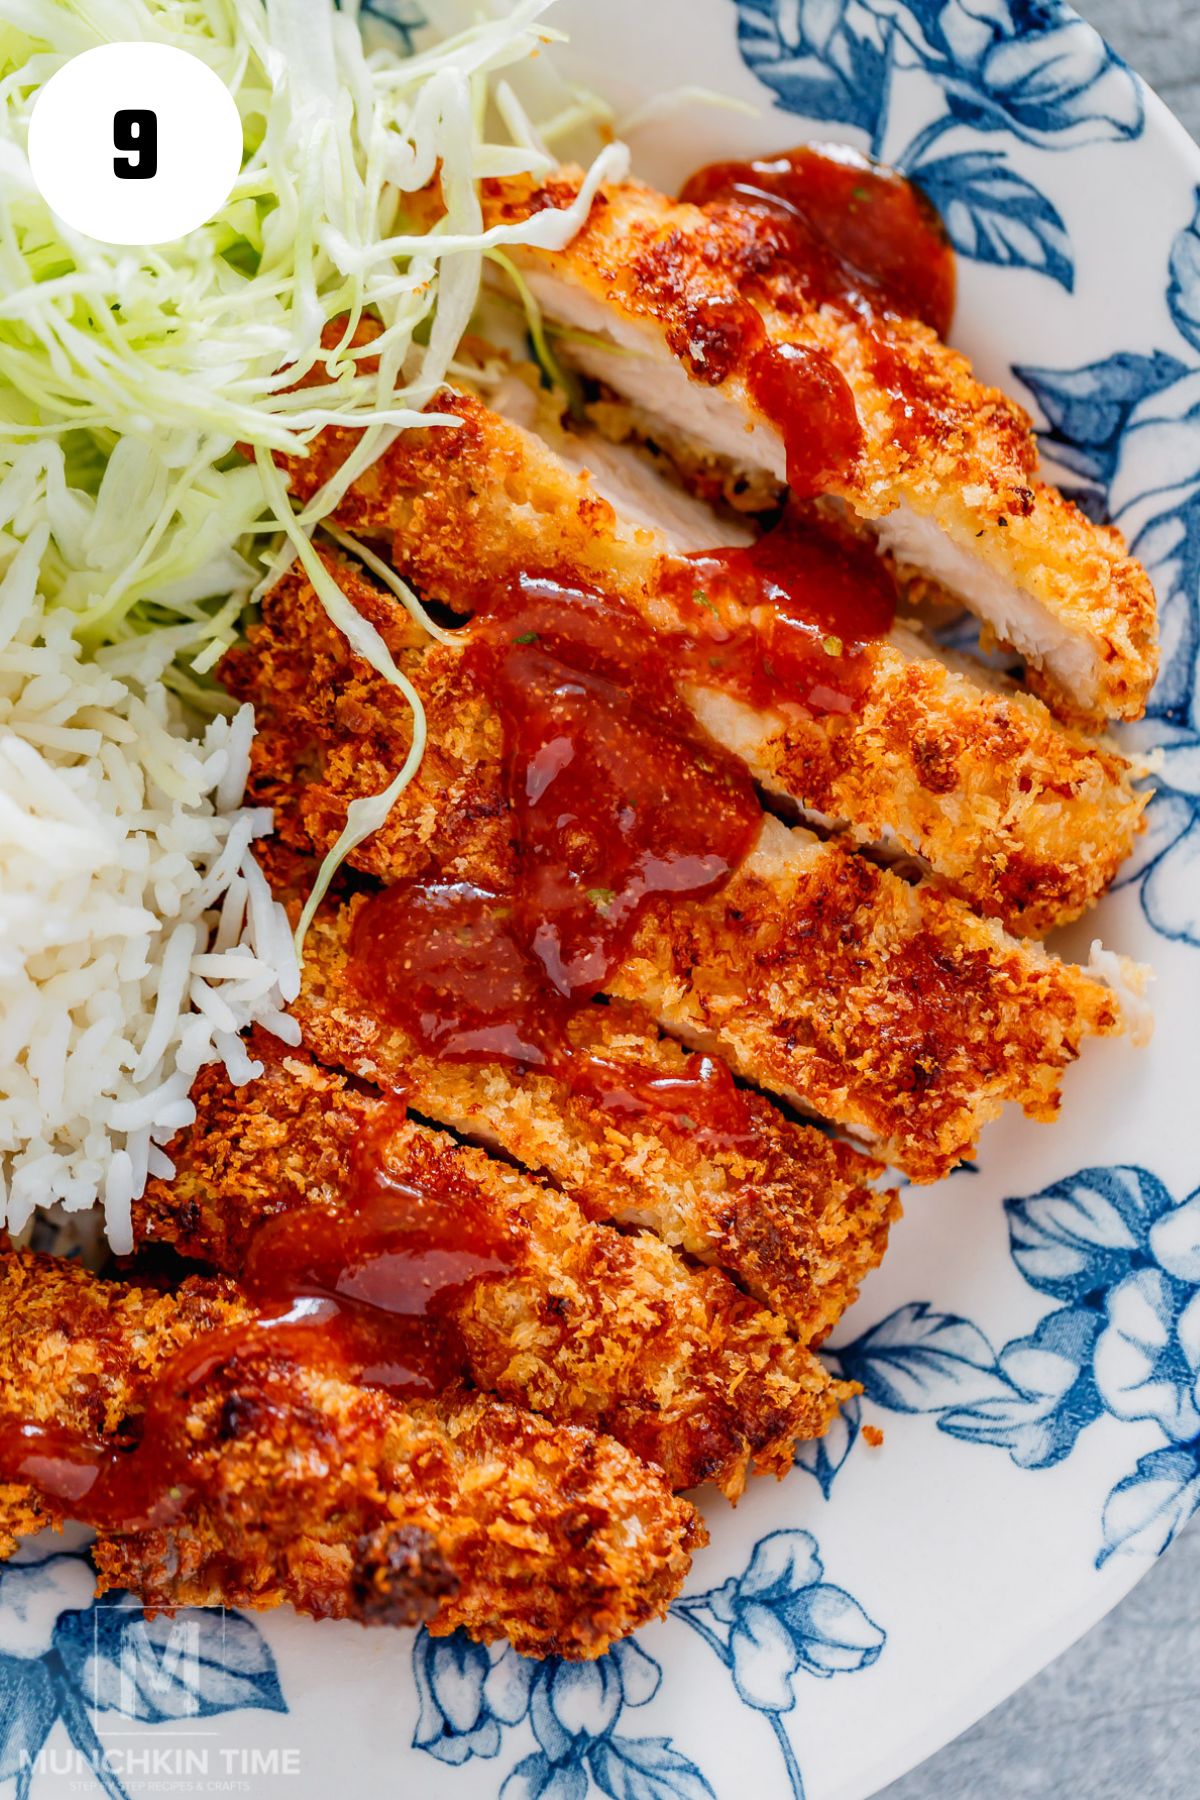
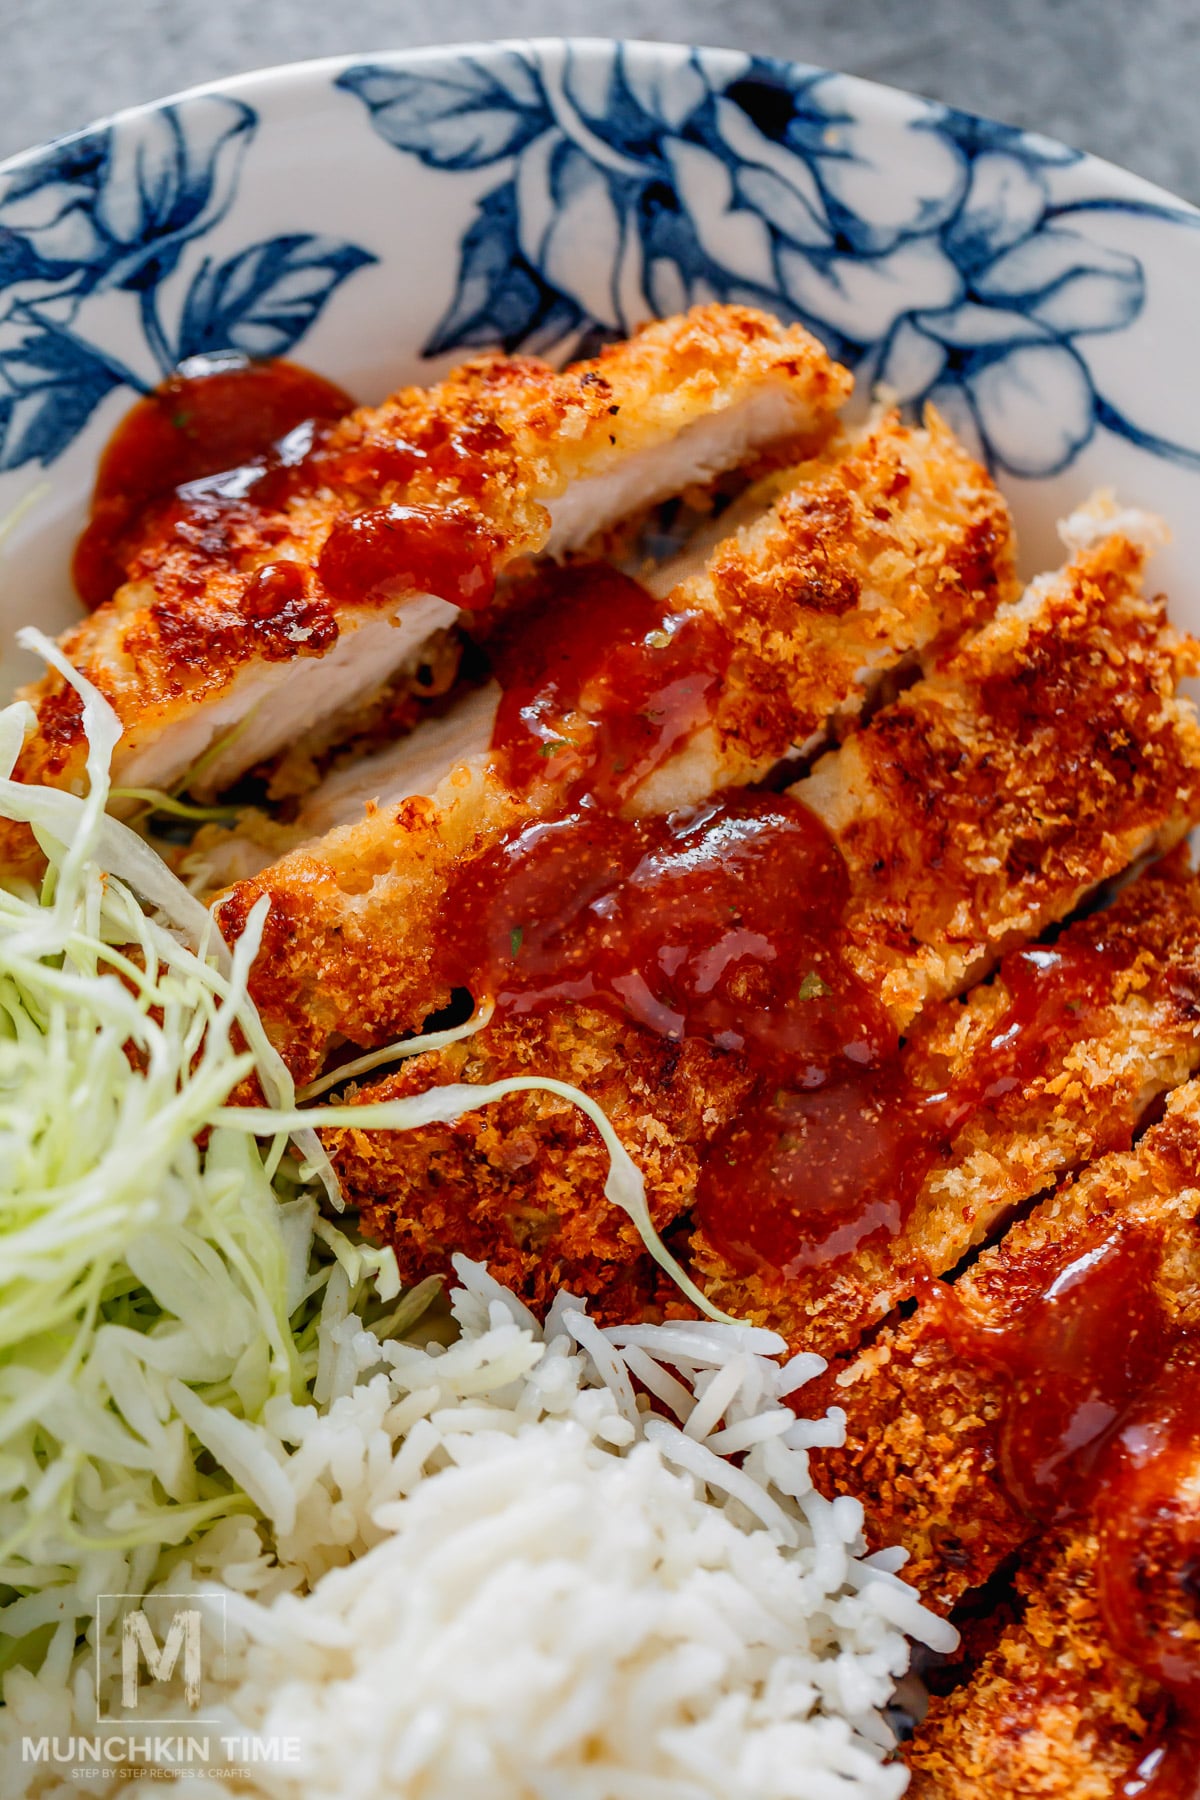
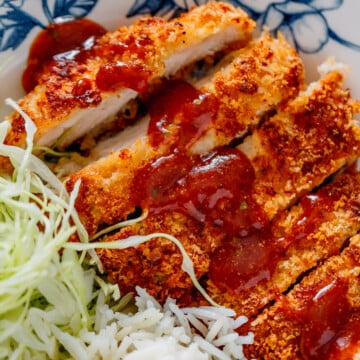
Step 8. Once everything is ready, slice the chicken into strips and serve it with steamed rice or fried rice with egg, and the chopped cabbage. Add the sauce on the side or drizzle it over the top—either way, it’s so good.
When Is Chicken Katsu Fully Cooked?
Your air fryer chicken katsu is ready when:
- Inside temperature reaches 165°F (74°C)
- The outside is golden brown and crispy
- Juices run clear (not pink)
- The chicken feels firm but still juicy when you press it
Pro Tip
Let the chicken rest for a minute or two before slicing. This helps keep all those juices inside and makes every bite extra tender.
FAQs
Yes! Chicken breasts work great, but thighs stay juicier and more forgiving.
Lightly spray oil and use panko breadcrumbs—this makes a big difference.
You can bread the chicken ahead and refrigerate, then air fry when ready.
Rice, cabbage, salad, or even noodles like Korean Noodles Stir Fry. It’s super versatile!
More Air Fryer Recipes
- Air Fryer Whole Chicken Recipe
- Crispy Air Fryer Chicken Wings
- Spicy Shrimp Patties - Air Fryer Shrimp Recipe (Video)
- How to Make French Fries in Air Fryer
- Bacon Wrapped Filet Mignon in Air Fryer
- Air Fryer Deviled Eggs
- Crispy Air Fryer Chicken Wings (Easy Garlic Mayo Recipe)
Share Your Chicken Katsu!
If you make this air fryer chicken katsu, tag us @munchkintimeblog on Instagram, or Pinterest, Facebook, Tik Tok, YouTube! We LOVE seeing your creations!
Please leave us a ⭐ review below!
Thank YOU for YOUR Comment, Share & Recipe Review!
📖 Recipe
Air Fryer Chicken Katsu (Crispy Chicken Thighs Recipe)
Equipment
Ingredients
Air Fryer Chicken Katsu
- 4 chicken thighs fat removed
- salt and pepper to taste
- 1 cup breadcrumbs I like to use Panko breadcrumbs
- avocado oil spray
For the Batter
- 2 large eggs
- ¼ cup flour
- 1 teaspoon sea salt or to taste
- ½ teaspoon black pepper or to taste
- 1 teaspoon garlic powder
- 1 teaspoon onion powder
- 3 tablespoons water
For the Sauce
- 4 tablespoons ketchup
- 1 tablespoon brown sugar
- 1 tablespoon Worcestershire sauce
- 2 tablespoons oyster sauce
- ½ tablespoon garlic powder
For serving
- 1 cup cooked rice
- 2 cups green cabbage shredded
Instructions
- Prep the cabbage: Chop your cabbage into small pieces and set it aside—you’ll use it for serving later.
- Season the chicken: Season chicken thighs with salt and pepper on both sides. Then gently pound them to about ½-inch thick so they cook evenly (this really helps keep them juicy!).
- Make the batter: In a bowl, whisk together egg, flour, water, salt, pepper, and garlic powder until smooth. It should look like a slightly thick batter.
- Coat the chicken: Pour panko breadcrumbs onto a plate.Dip each chicken thigh into the batter, then place it into the panko and coat really well, pressing the crumbs in so they stick nicely. Repeat with the rest.
- Into the air fryer: Place the coated chicken into the air fryer basket in a single layer. Give the tops a light spray of oil—this is what helps it get that golden, crispy crust.
- Cook until crispy: Air fry at 360°F for 10 minutes, then flip and cook another 7–10 minutes, until the chicken is cooked through and beautifully crispy on the outside. (Every air fryer is a little different, so keep an eye on it.)
- Make the sauce: In a small bowl, mix ketchup, brown sugar, Worcestershire sauce, garlic powder, and oyster sauce until combined.Pro Tip: Let the sauce sit for 10–15 minutes before serving—it allows the flavors to meld and taste more balanced.
- Assemble and enjoy: Add steamed rice, sliced chicken katsu, and cabbage to your plate (or meal prep container). Serve with the sauce on the side and enjoy every crispy bite. Tip: Let the chicken rest for a minute or two before slicing—it helps keep all those juices inside.
Notes
- Chicken thighs work best for this recipe because they stay juicy and tender, but you can use chicken breasts if that’s what you have.
- Pound the chicken evenly so it cooks through at the same time and doesn’t dry out.
- Don’t skip the oil spray—it helps the panko turn golden and crispy in the air fryer.
- Cook in a single layer and avoid overcrowding the basket so the chicken crisps up nicely.
- Cooking time may vary depending on your air fryer, so check that the chicken is fully cooked and crispy before removing. Or when inside temperature reaches 165°F (74°C).
- Let the chicken rest for a couple of minutes before slicing to keep it juicy.
- This is best served fresh, but leftovers can be reheated in the air fryer to bring back the crispiness.
Nutrition
Happy Cooking!


Leave a Reply